Schedule a demo of LiquidPlanner with a product expert today


We all know “that” drawer. You know, the one in your kitchen that catches batteries, keys that don’t belong to any lock in your house, and endless supplies of takeout menus.
Now picture yourself in springtime, feeling energetic, hopeful, and ready to tackle the clutter that slowly built up over winter.
Instead of encouraging you to donate those sweater vests you haven’t worn in years (you probably should), I’d like to invite you to put a bit of that industrious spring energy into your LiquidPlanner workspace. Inevitably, your workspace will start to get a bit cluttered over time and may even resemble that aforementioned drawer.
Whether you’re ready to tackle the entire workspace or just dedicate a few minutes toward a quick refresh, the tips below will help you get rid of the things you don’t need so you can focus more on the work that matters today and in the future.
Easy (5 Minutes or Less):
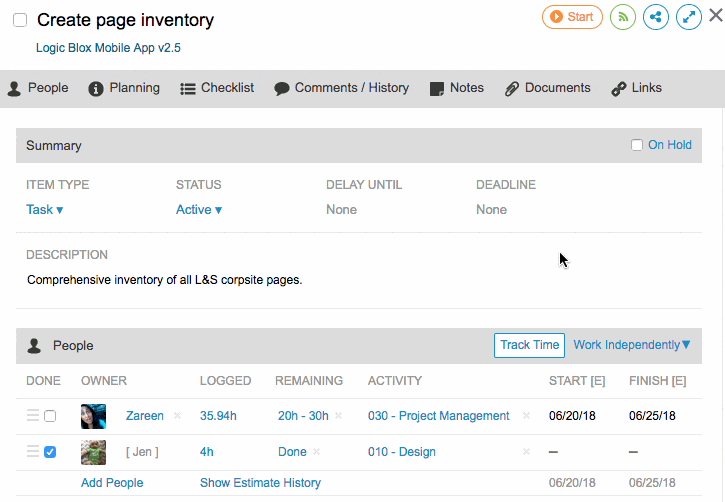
1. Review your Custom Fields
Custom Fields are one of the more powerful ways to organize data in LiquidPlanner. As they’ve evolved over time, Custom Fields have become an integral part of most customer workspaces.
Customers often build out Custom Fields that don’t get used. If you’re a workspace administrator, head over to the Settings page and look at the Custom Fields section of Data Customization.
Are you using all of the Project Custom Fields now? How about all of the Task Custom Fields? If not, delete them!
Not only will you free up clutter in the Edit Panel of your tasks and projects, but you’ll also free up a slot for a new Custom Field you can use moving forward. Do be forewarned, if you delete a Custom Field, those categorizations will be deleted in Dashboards and Analytics as well.
2. Put items on hold
As a Sales Engineer, I give this advice almost every day. Not only will it help visually declutter the workspace, but it will also help keep the scheduling engine operating as quickly as possible.
I like to think that putting items “On Hold” or using Backlog Packages can apply to anything you aren’t currently working on or imminently planning.
Storing bugs for later? Building out templates that you’ll copy for future projects? Taking change requests that need to be triaged? Place them all on hold. All items in LiquidPlanner have the On Hold box within the Edit Panel so you can use this for Tasks, Projects, Packages, or any other items you don’t need to see on the schedule until later.
As an added bonus, this will also help declutter the My Work tab and the Timesheets tab for your individual contributors so they can easily concentrate on what is important in the near future.
Intermediate (15 Minutes or Less):
1. Mark items complete
I know this sounds basic, but we see workspaces with Tasks and Projects with zero work remaining that are still left open. Similar to the tip above, this will help declutter the Projects tab and can help take weight off of the scheduling engine.
To do this easily:
- Click the gear to Customize Columns and make sure the “Logged” and Remaining [E] columns are selected for easy viewing.
- Click the Filter button on the Projects tab and select “Filter by Status.”
- Then choose “Zero Work Remaining” and LiquidPlanner will automatically pull in all items without work remaining.
- From there, you can easily multi-select and then click the checkbox to mark the items as complete.
- As one precaution, make sure only to mark items complete that have already had time logged to them as the ones without might be unestimated items. (We’ll address this issue in the Advanced section.)
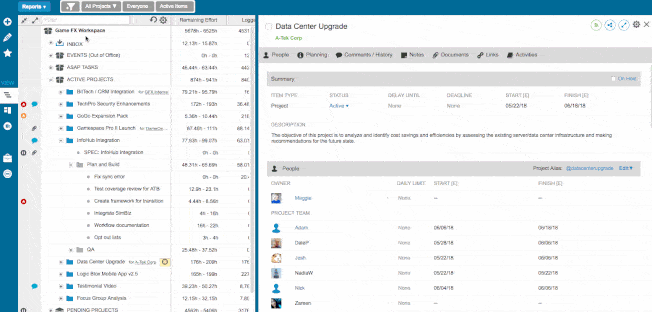
2. Clean up Daily Limits
Daily Limits are one of the more powerful tools LiquidPlanner has for PMs who are managing multiple projects at a time and allow them to set allocations across several projects or tasks throughout their portfolio. That said, they also can cause the scheduling engine to take more time to refresh your schedule as it allocates your resources over multiple projects, so try to use them only when necessary.
Find you aren’t using them as prescriptively as you used to? Or have you moved away from Task Daily Limits and are using the much more efficient Project Daily Limits since we released those in 2017?
Now is a great time to clear the limits you no longer need.
You can easily do this by bringing in the “Daily Limit” column in the Projects tab. Just concentrate on the blue Daily Limit symbols (the grey ones are inherited and will be removed when the parent Daily Limit is deleted). Any that are superfluous now can be removed and you may notice a speed increase in your reschedules if you have a particularly large workspace.
Advanced (30 Minutes or Less):
1. Flatten structures
Does your workspace have Packages for each month or each department? Several layers of Subfolders within each project? As a staunch advocate for workspace simplicity (without sacrificing power), I encourage you to “flatten” out the structure of your plan.
There are a few key concepts to consider as you evaluate shifting your structure:
- For Packages: Are resources shared across your various Packages? If so, the order in which the Packages are built will dictate the priority in which they’re assigned for each of your resources.
- For Subfolders: Are you using them to represent phases or classifications of work? If so, do you want to be able to report on each of them individually? If yes, you should always use a single layer of Subfolder. “Nesting” them will limit your ability to view reporting in Analytics. Our Subfolder Roll-up Report will roll-up the information for only the top layer of Subfolders.
- For additional organization: If you feel like you need more detail than just one layer of Subfolders or one layer of Packages, think about utilizing Custom Fields or Tags to help organize your work a bit more. Tags are great for quick filters in the Projects tab or on an Analytics report and won’t limit your ability to view any data in reporting later.
2. Estimate tasks and assign owners
I saved my favorite tip for last—get rid of those glaring “0h” estimates and red “Unassigned” resources.
Not only will it make everything more streamlined, it will also help your project plan be more accurate. Depending on the size of your workspace, time to fix this can vary but the steps are relatively easy.

For unassigned items:
- Go to the Projects tab and open the Filter menu.
- Select “Unassigned.” This will quick filter to items that do not have an owner.
- You can easily assign owners from this view.
For items without estimates:
- While on the Projects tab, pull in the “Logged” column.
- Open the Filter menu and select “Filter by Status.”
- Choose “Zero Work Remaining.”
- LiquidPlanner will then filter down to items without any work remaining. Look for items with both zero work remaining and zero time logged (the inverse of the “marking things complete” task above) and add estimates to those items.
If you choose to take on one or all of these tips I think they can quickly make your workspace a more organized and easy to digest place to get more work done.
Have questions? Don’t hesitate to reach out to our support team for help. Happy cleaning!