Build a CI/CD Pipeline in the Cloud: Part Two
Welcome back! In Part 1, we summarized the goals of the exercise: To develop a microservice and set up a CI/CD pipeline in the cloud without using any locally-installed development tools. We’re going to walk through it step by step in a gentle and friendly way.
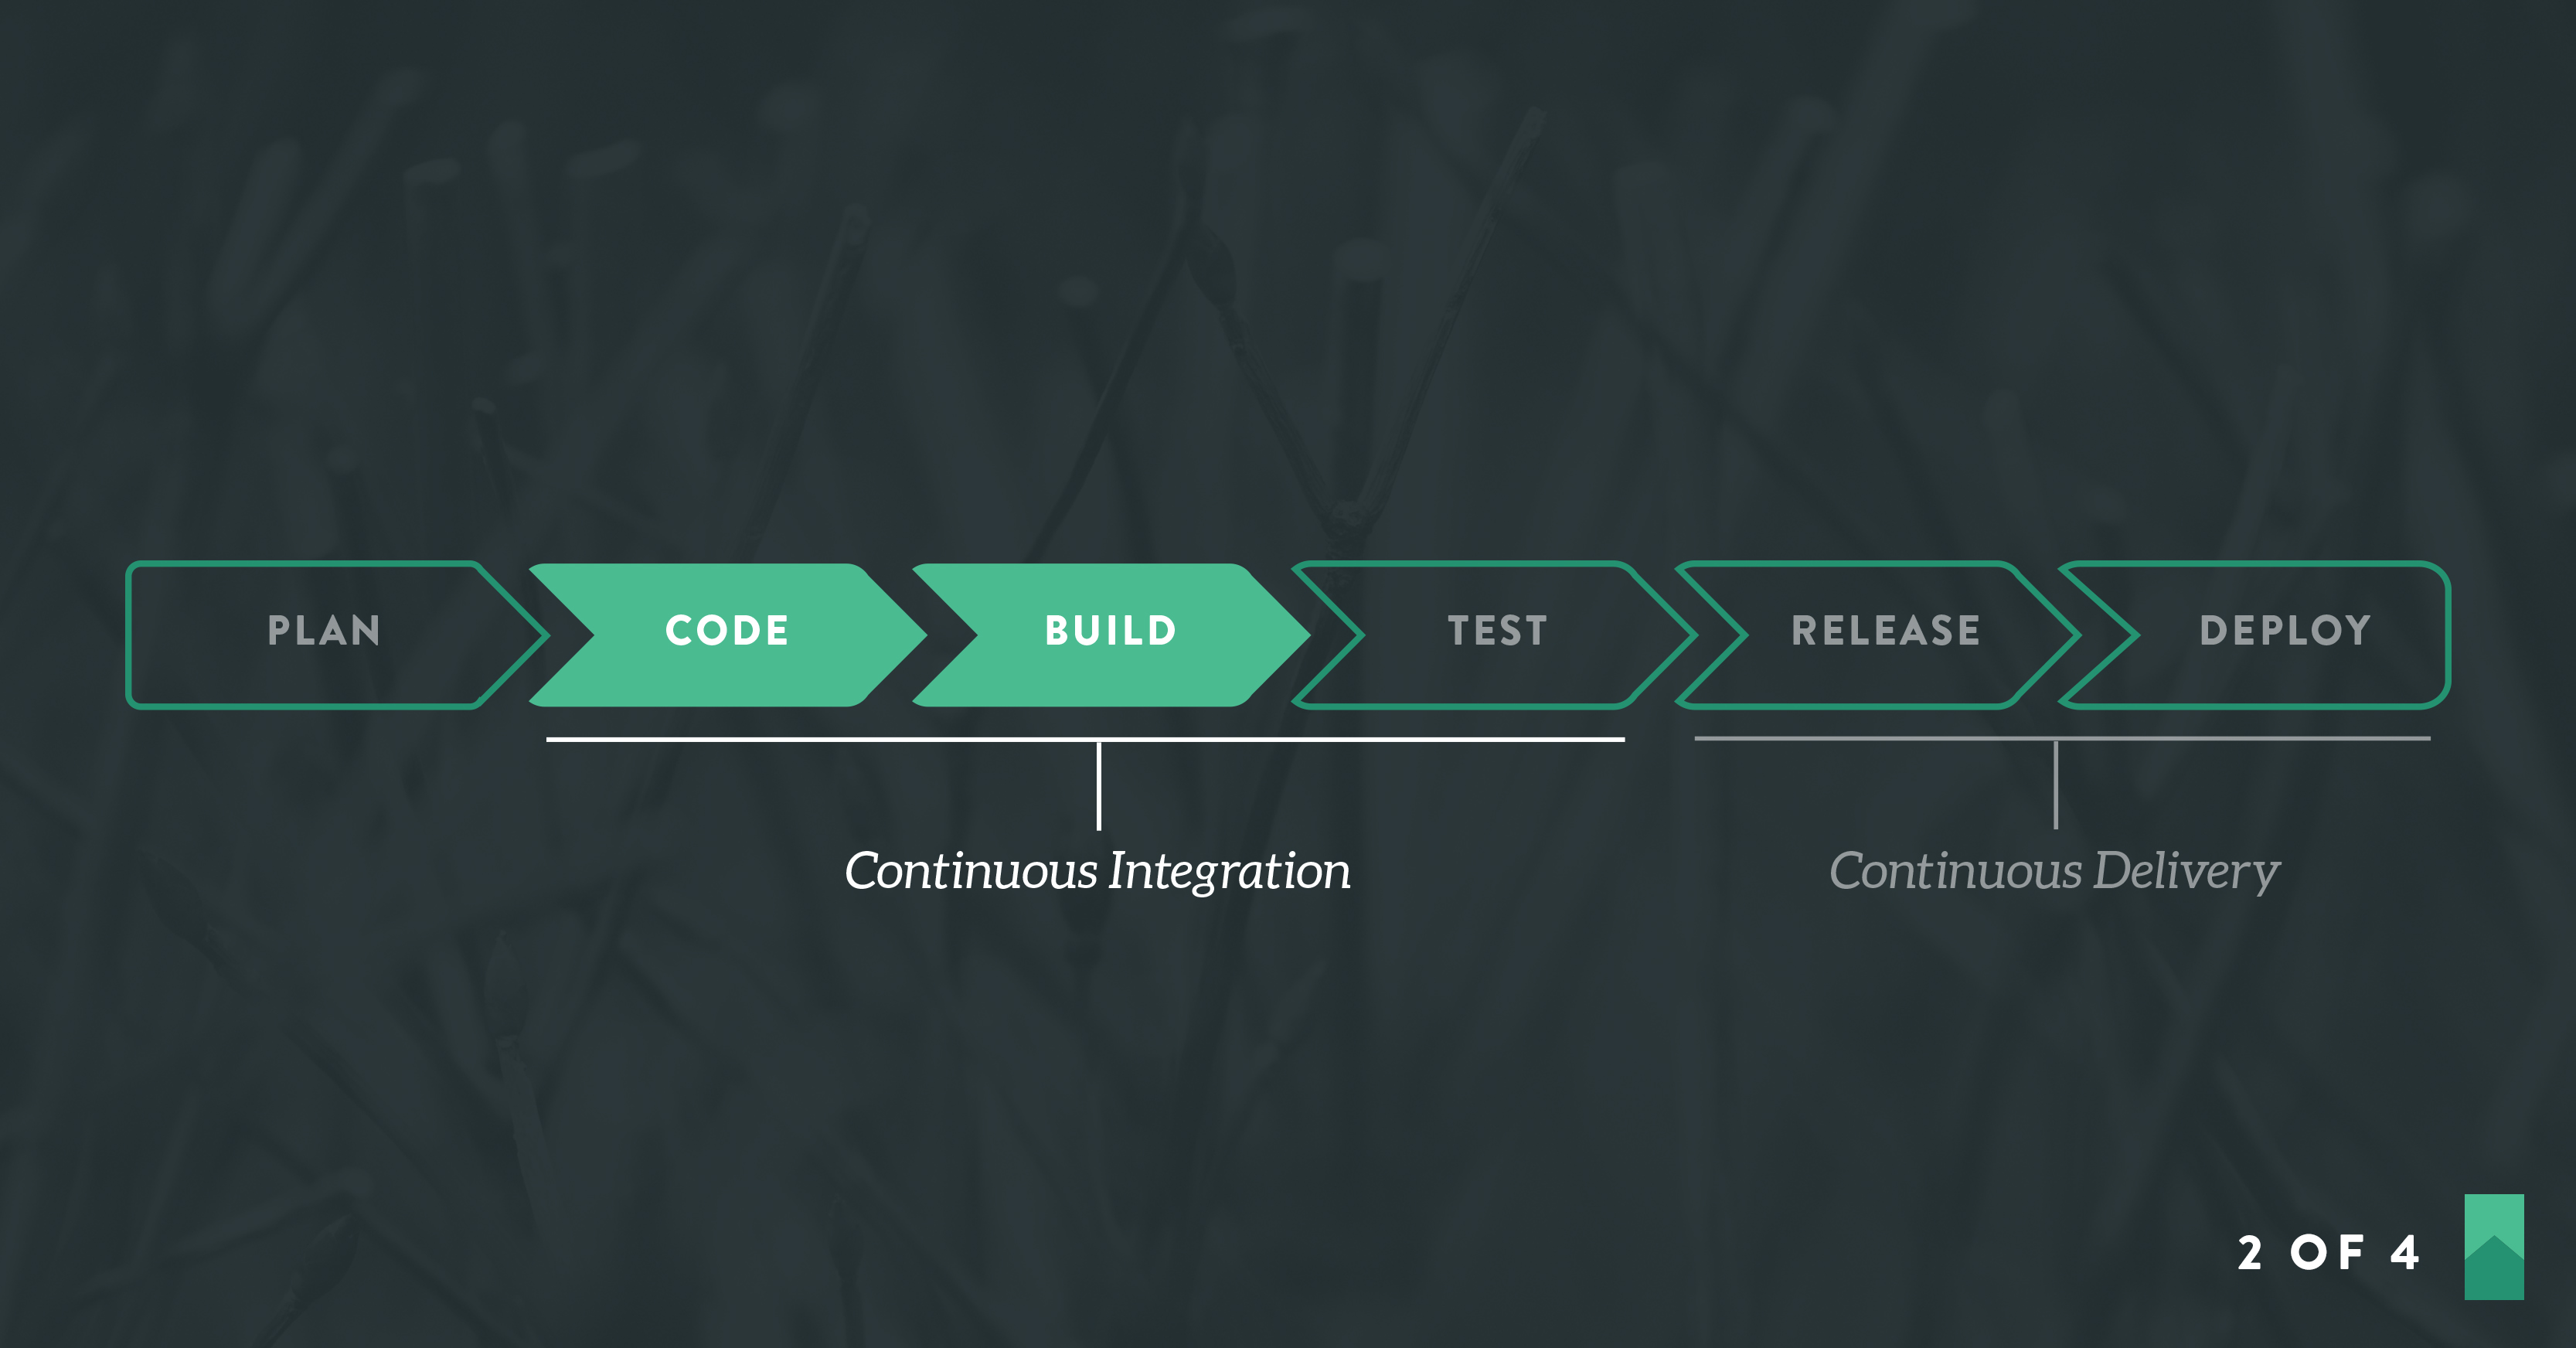
In Part 2, we’ll start to configure our delivery pipeline. We’ll cover version control, dependency management, and run management. In Part 3, we’ll test-drive our application and in Part 4 we’ll complete the rest of the delivery pipeline.
Where Were We?
Right…you had some homework to do. Have you set up free accounts with these online services?
- A free account on Github. This will be the version control system.
- A free account on Code Anywhere. This will be the development environment.
- A free (Open Source) account on Travis CI. This will be the continuous integration service.
- A free (Open Source) account on Code Climate. This will be the test coverage and static code analysis service.
- A free account on Heroku. This will be the production environment.
Good. Let’s get started!
Hello
I don’t have to tell you that we spend most of our time working with existing code bases, and we don’t often get to start with a clean slate. When we can start with a clean slate (like right now, for example), what’s our first move?
In the old days, people would build applications in horizontal layers starting at the “bottom.” For instance, they would fully define the database schema before starting any other work. Then they would build up the logical layers of the application from the back end forward.
That approach guarantees two things:
- Stakeholders won’t see anything they can relate to until there’s no time or money left to make changes, and
- Developers won’t discover their initial architectural assumptions were wrong until there’s no time or money left to make changes.
Nowadays, our first move is to validate our architectural assumptions by punching through the (proposed) architecture from front to back; “there and back again,” as J.R.R. Tolkein might have put it.
Some people like to say we deliver vertical slices of functionality. Our first slice is going to be a very thin one.
This approach guarantees two things:
- Stakeholders see something working almost immediately. It doesn’t have to be much; it’s sufficient that it’s something as opposed to nothing. This gives them confidence that the development team knows what they’re doing, so they won’t need to ask for revised estimates every day for the next umpteen months. They’ll see the solution emerge bit by bit, and they’ll have ample time to make changes as they see the need.
- If any of the team’s initial architectural assumptions prove to be wrong, they’ll have ample time to adjust.
Now, your friendly neighborhood Agile Coach has probably hammered home the point that every piece of work the team carries out must deliver customer value. Some teams burn several days biting their fingernails as they try to find a way to express this initial architectural validation in the canonical form of a User Story.
Let’s bypass all that and go straight to another kind of Story, which some people call a System Story or a Job Story. Instead of “As a something I want something so that something,” we express the need in a form more like this:
Story:

In order to validate architectural assumptions
We want to see a simple transaction flow all the way through the system

Acceptance criteria:

When a user submits a "Hello" request
Then the system responds with "Hello"
This could be the only Story the team tackles in their first development cadence or iteration or Sprint or what-have-you. As simple as it sounds, it involves setting up all the scaffolding for the project, at least in a basic way.
You probably have some questions about all this, such as:
- How can we exercise the system if we don’t have a user interface?
- What does it mean to “submit a request?”
- How do we expect the system to say “Hello?”
- When are we going to stop talking and write some code, FFS?
1. How can we exercise the system if we don’t have a user interface?
Our goal is to develop a microservice and not a UI. Other people are welcome to develop a UI to access our service if they want to. We don’t need a UI to invoke our service. A service can be invoked by any mechanism that can send an HTTP request. We could use a command-line program such as curl, access the service through a Web browser, or write unit test cases that call the service.
2. What does it mean to “submit a request?”
We’re building a microservice, so we’ll assume the usual conventions for invocation. That means we’ll call a RESTful API over HTTP. Internet resources are identified by a URL or URI. For those of you who don’t come from a programming background, that spoonful of alphabet soup translates into:
- REST = Representational State Transfer. This is the architecture of the World Wide Web, which is the “part of” or “window into” the Internet that you’re probably accustomed to using via your favorite Web browser. It’s the natural way to request services in the Web environment. We don’t have to invent our own architecture to write our application.
- API = Application Programming Interface. An API is a defined way for programs to interact with other programs. There are API guidelines for REST. We don’t have to invent them to write our application.
- HTTP = HyperText Transfer Protocol. This is the protocol (rules for exchanging information) of the World Wide Web. Every time you access an Internet resource whose address begins with “http://” you’re using this protocol. We don’t have to invent our own protocol to write our application.
- URL = Universal Resource Locator. A string value formatted in a particular way that is understood by HTTP servers. It looks like this: [protocol]://[servername][domain][:port]/[path]. So we might have: http://myserver.somedomain.com:8080/account/123456789. When passed with the HTTP verb GET, it means “retrieve the resource identified by ‘account/123456789’ from server ‘myserver’ on domain ‘somedomain.com’ on port ‘8080’.” Intuitively, it looks as if this is requesting data for account number 123456789, whatever that means in context. This example is RESTful, because the server will transfer (send) a representation (data) of the current state (current values) of the resource identified as ‘account/123456789’. Other kinds of requests (not RESTful ones) might have a different layout for everything in the URL after the domain or port.
- URI = Universal Resource Identifier. For all practical purposes, the same as URL.
- Semantic Versioning. One more wrinkle. APIs are versioned. We can’t predict or control when clients will update their code to work with new versions of an API. Therefore, the generally-accepted good practice is to support multiple versions of an API. The most popular versioning scheme in use today is called Semantic Versioning. A version number usually has three parts, major, minor, and patch. The general convention is that versions under the same major number are guaranteed to be backward-compatible. For RESTful URLs, the most common practice is to embed the version number in the URL as the first part of the path data, prefixed with a “v”, like this: http://myserver.somedomain.com:8080/v2.0.6/account/123456789. This version of the API is guaranteed to work for clients that are coded to use version 2.0.5, 2.0.4, etc. It is not guaranteed to work for clients that are coded to use version 1.x.x.
3. How do we expect the system to say “Hello?”
We don’t actually expect the service to “say” anything, although that would be possible. 😎 We expect it to return some text to us that contains “Hello” in some form. Typically, services return text in one of three forms:
- plain text
- XML (eXtensible Markup Laguage)
- JSON (JavaScript Object Notation)
You might think that we don’t need anything more complicated than plain text for this initial story, as the purpose is to punch through the architecture and make sure we can get something back from the microservice. That’s true, except that the goal of validating our architectural assumptions calls for us to demonstrate at least a minimum implementation of all the pieces and parts that are usually associated with microservices. Given the state of such things today, that means support for JSON and possibly support for both JSON and XML.
4. When are we going to stop talking and write some code, FFS?
Now.
Step 1: Create a Repository on Github
Version control is the heart of the pipeline, so that’s where we’ll begin. Go to your Github account and set up a new repository, or “repo”.
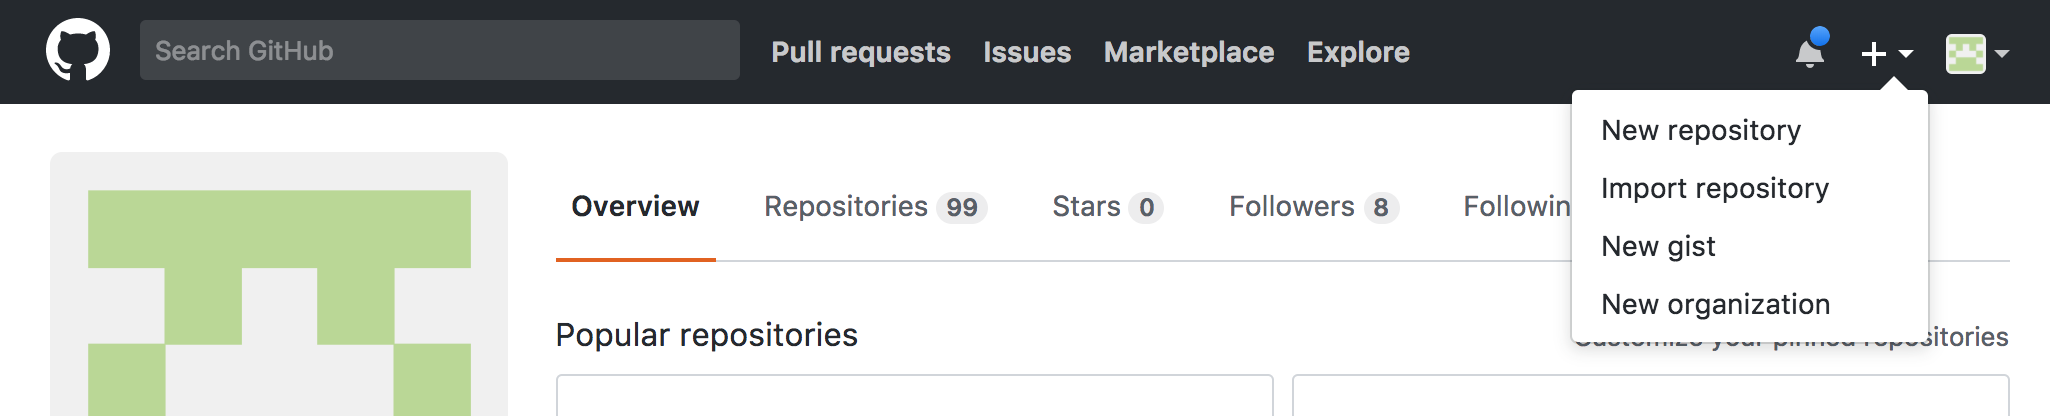
The “plus sign” icon near the upper right-hand corner of the Github window in your Web browser opens a drop-down menu. Choose New repository from that menu.
The New repository form opens, and you fill in a couple of fields. Here’s how mine looked when I set up the repository for this exercise:
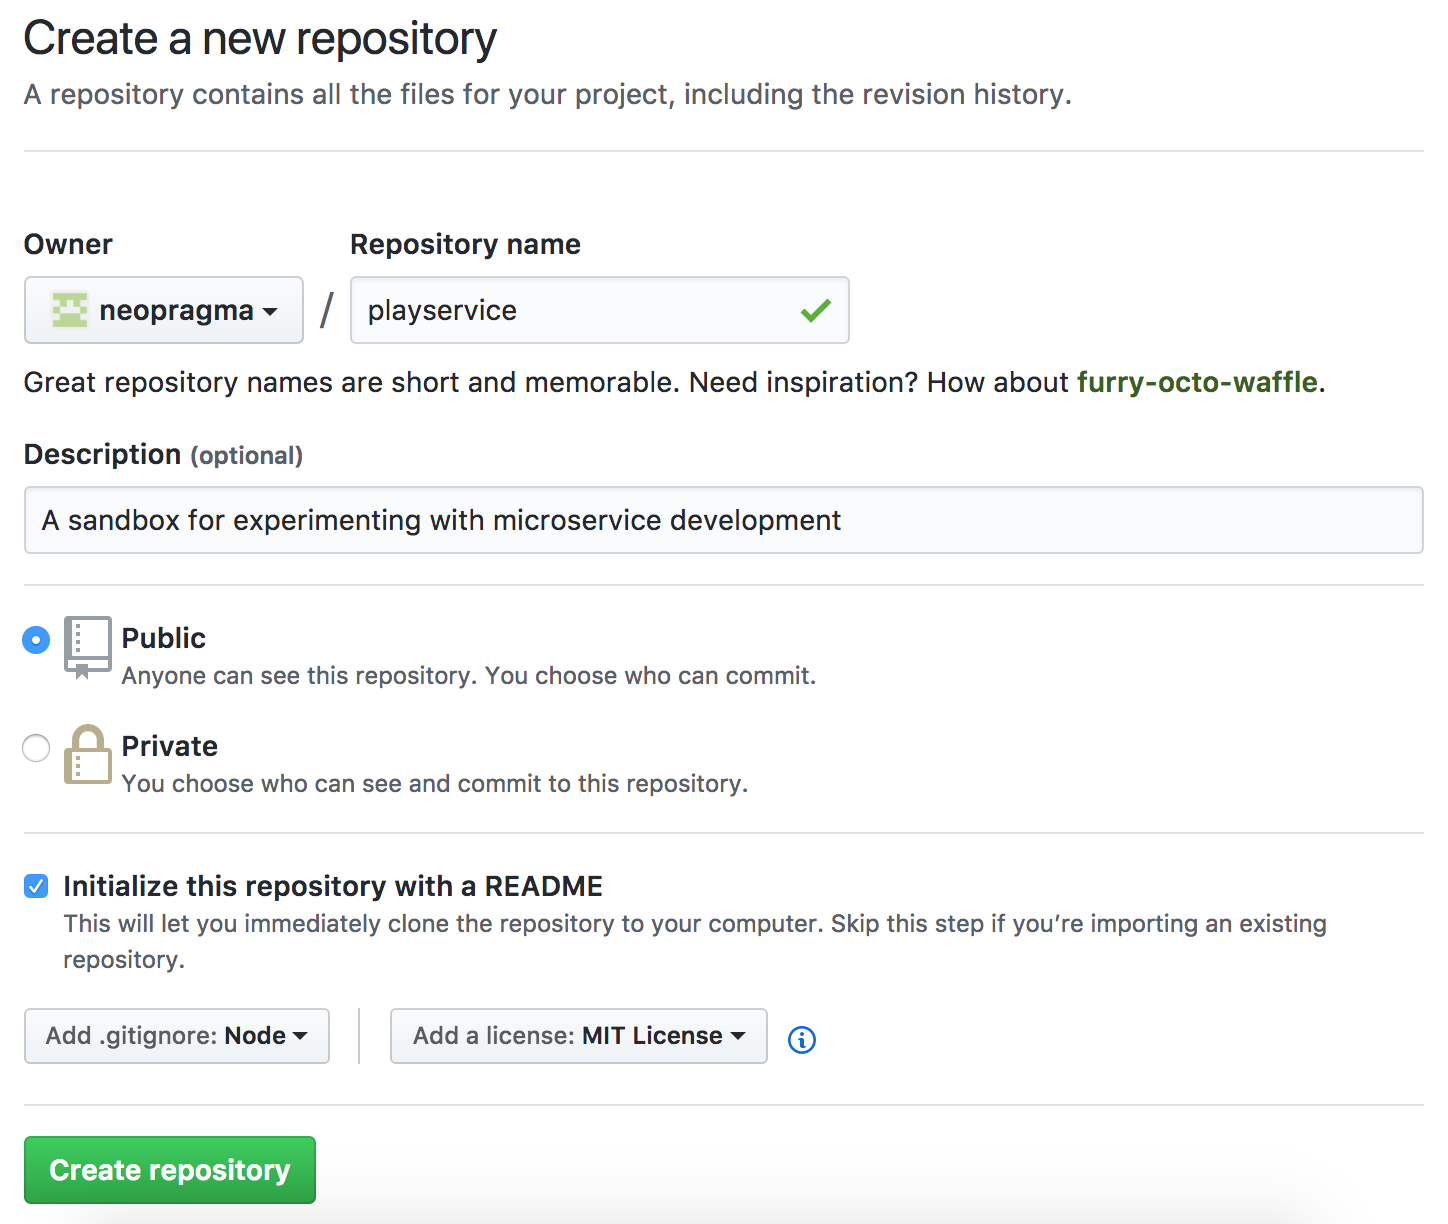
Remember that some of the online services we’re using are free only for Open Source projects, so be sure and create a public repo and not a private one.
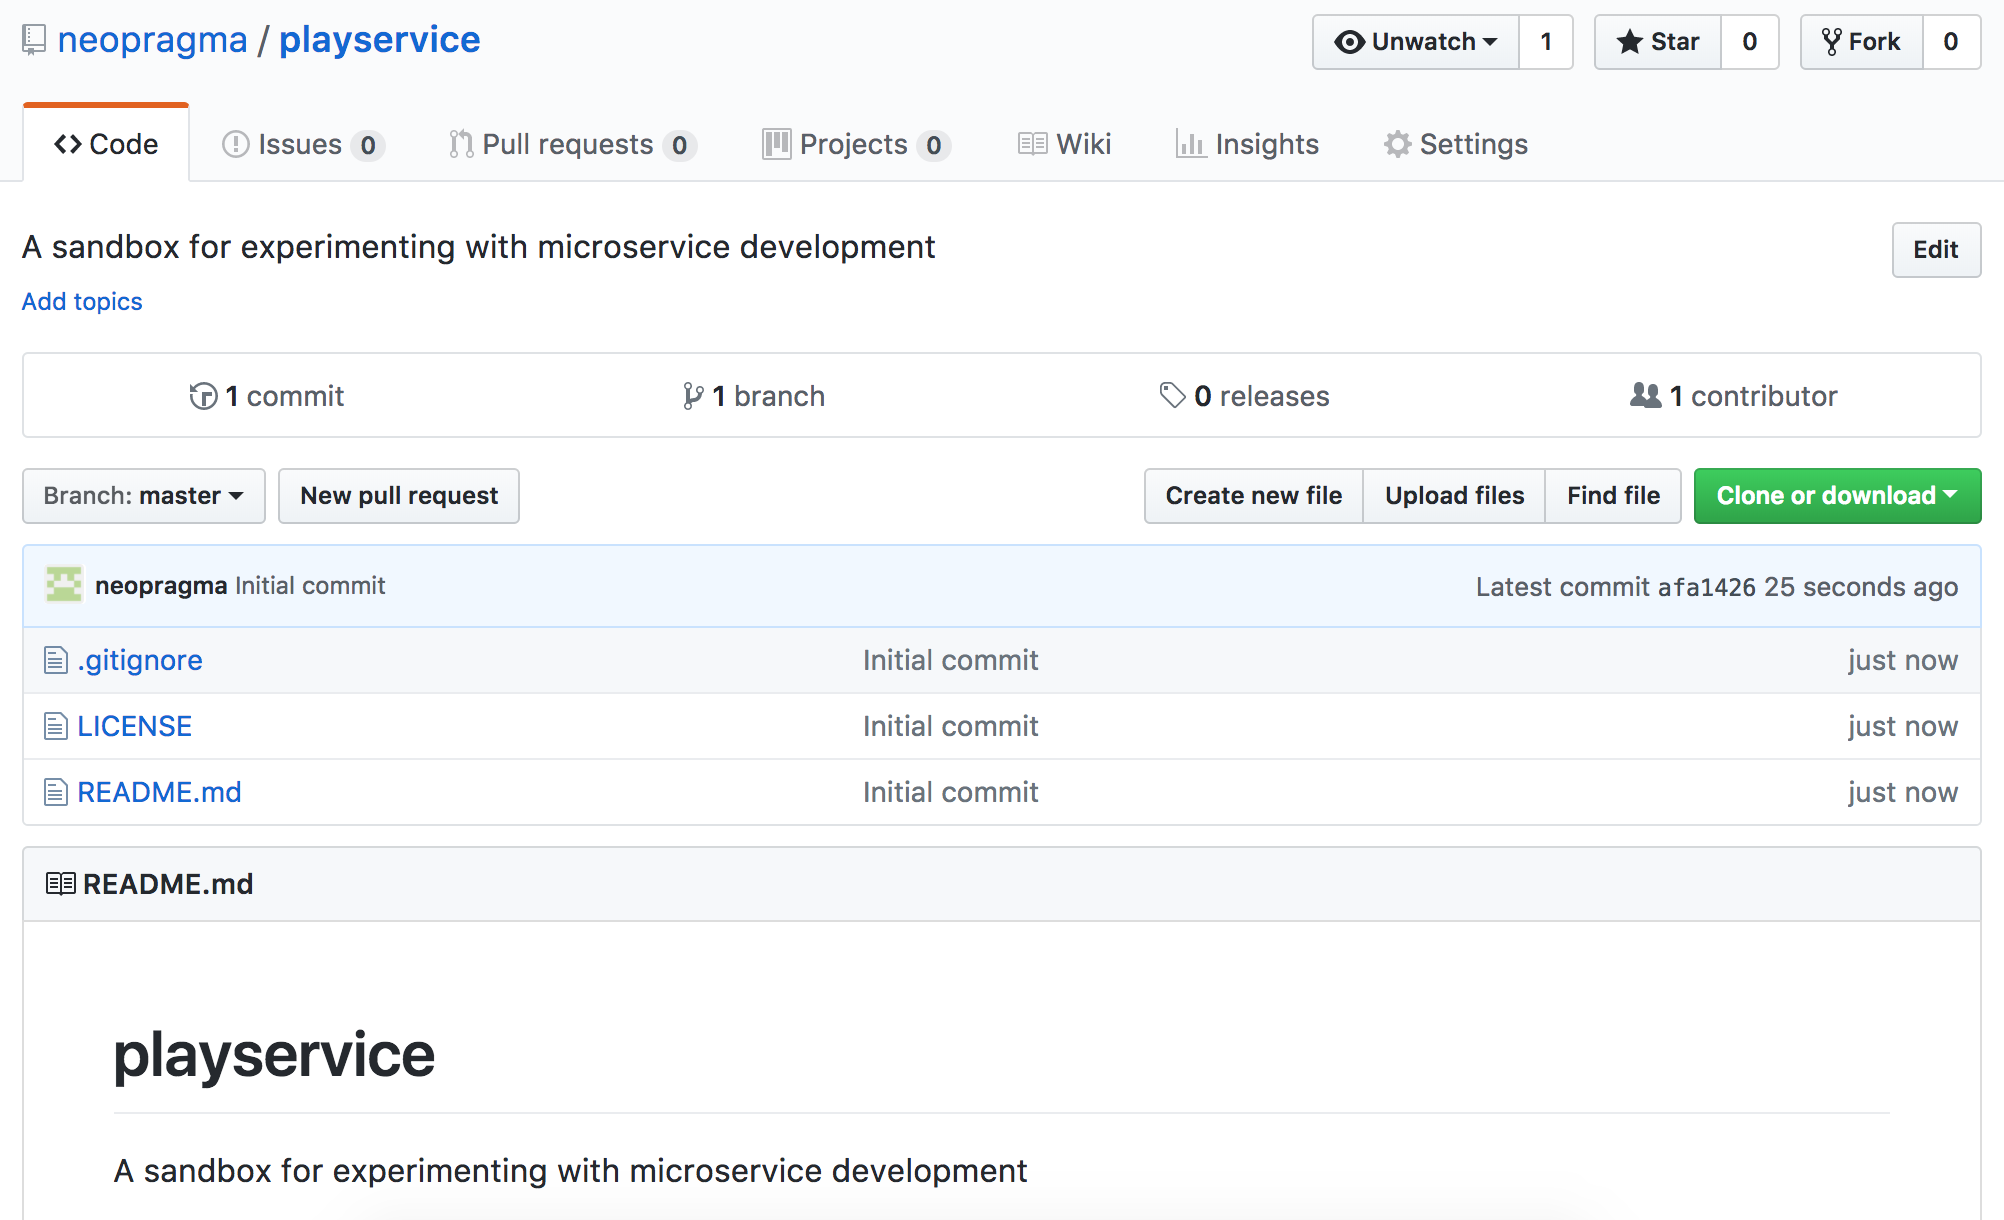
I selected Initialize this repository with a README. I also selected Ruby from the drop-down list under Add .gitignoreMIT License from the drop-down list under Add a license. The result was:
Your Github repository will be where you control continuous integration and continuous deployment. You’ll see that you can do some of these things in other ways (including deployment from Code Anywhere), but you would normally set these things up to be driven from version control.
Step 2: Create a Project on Code Anywhere
Sign in to your Code Anywhere account. Choose New project. I named mine playservice.
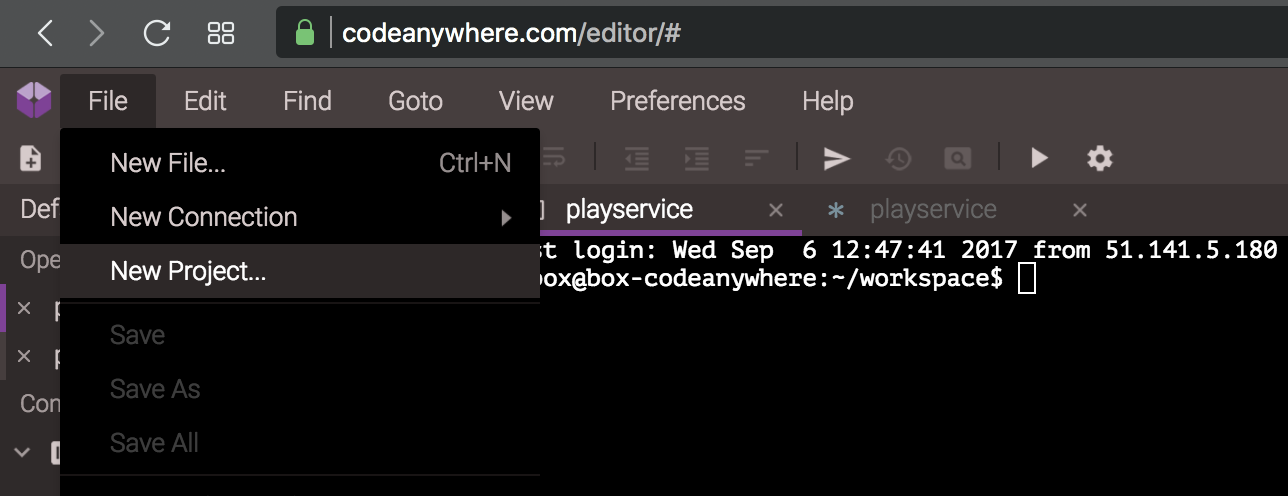
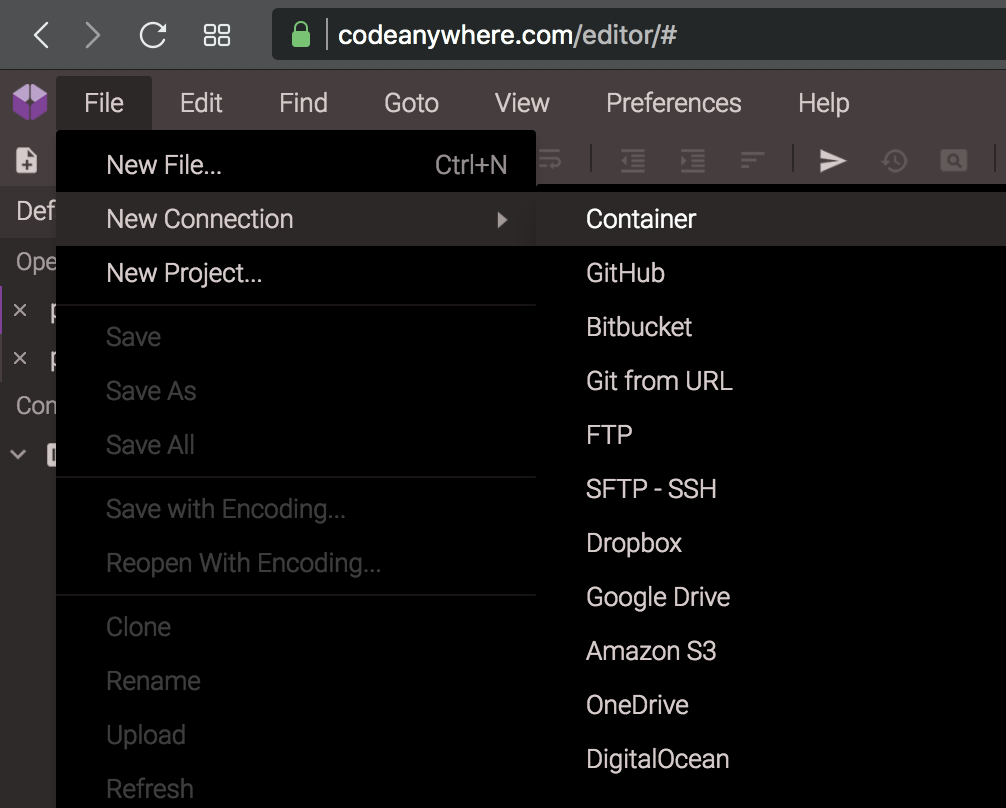
Create a container. Select New connection from the File menu. It will create a connection to the new container.
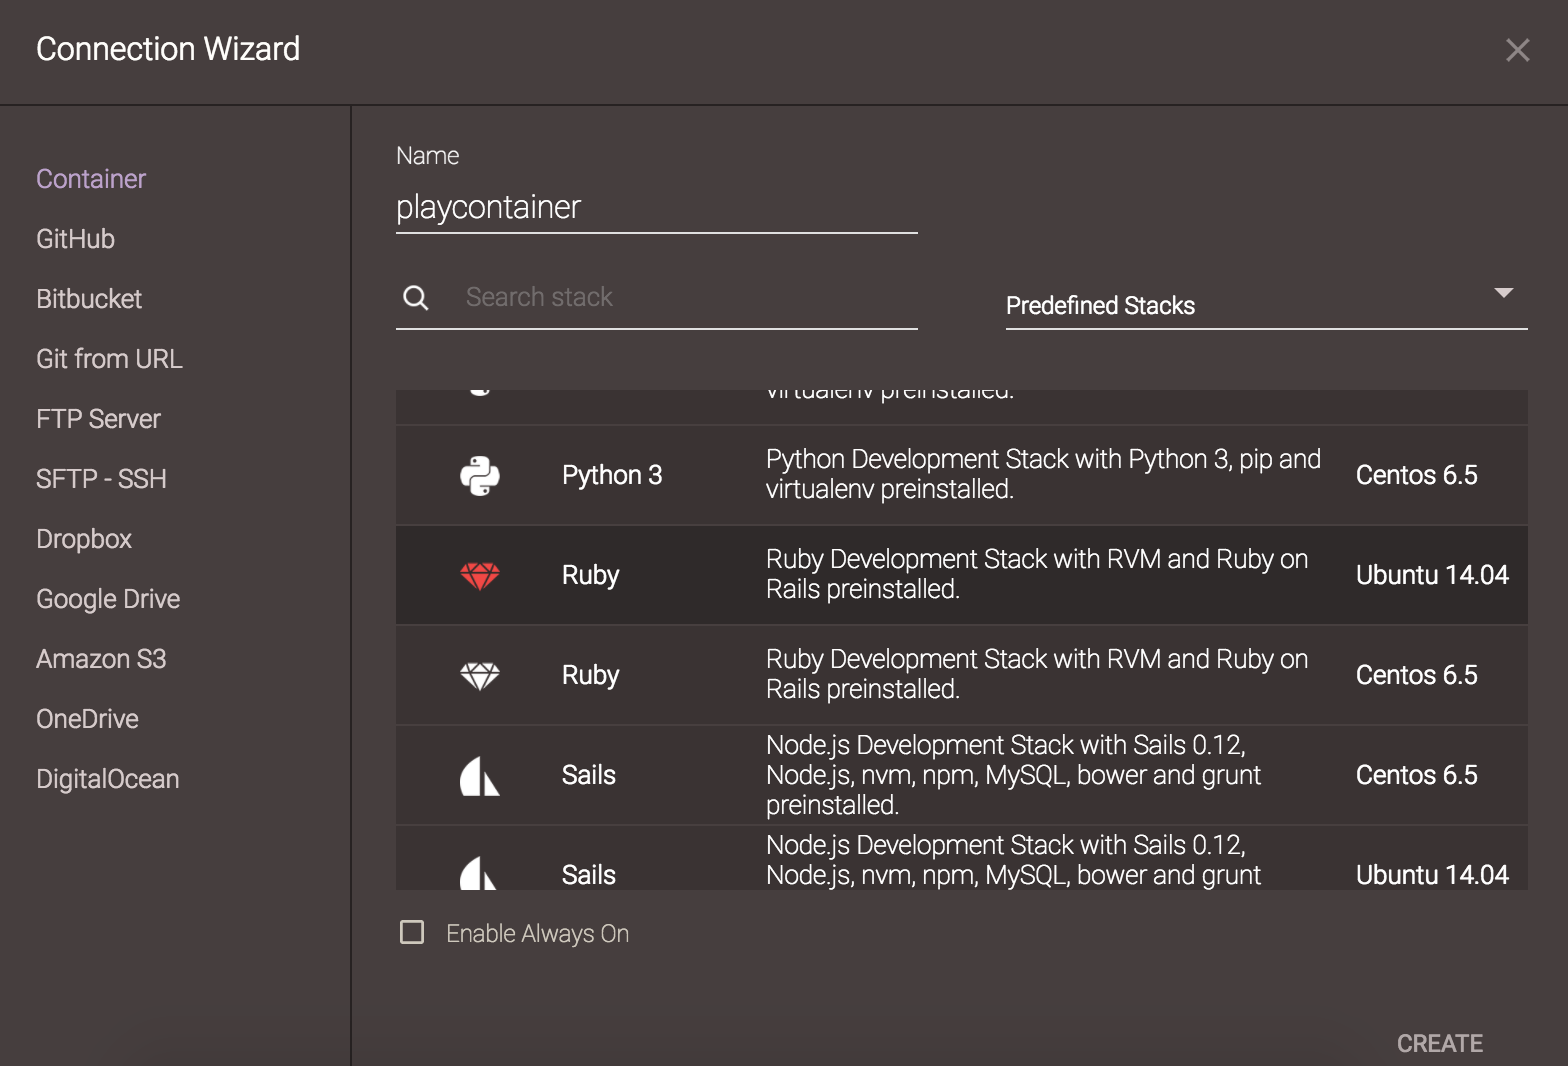
Choose Ruby in an Ubuntu instance. I named mine playcontainer.
Step 3: Clone the Github Repo
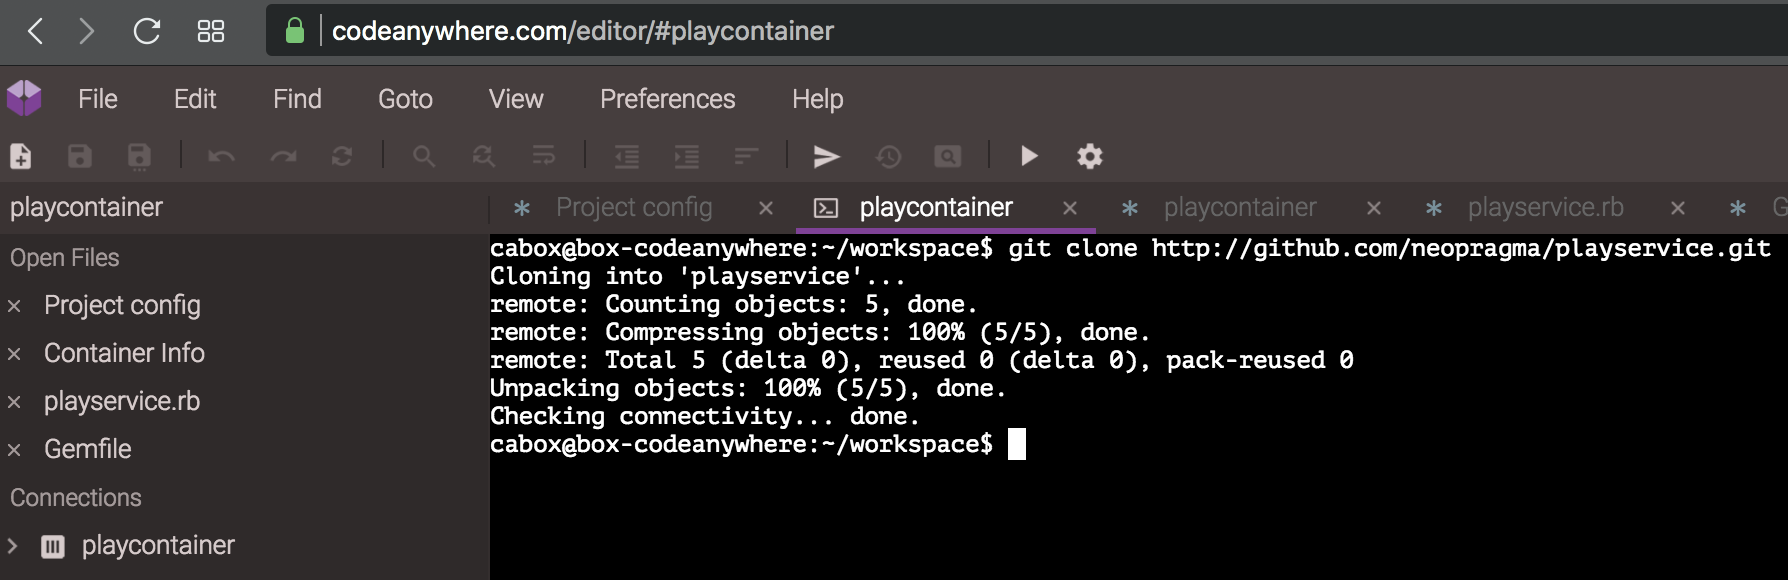
The way to bring your Github project into the Code Anywhere development environment is to clone the Github repo. Code Anywhere containers have git client code installed by default, so you needn’t install it. You can enter a git clone command in the command-line tab of your Code Anywhere container. My Github URL was http://github.com/neopragma/playservice.git.
git clone http://github.com/[your Github id]/[your repo name].git
It will look something like this:
Step 4: Configure the Dependency Manager
“Real” software projects generally use a build tool to prepare the code to run and a dependency manager to bring in any libraries the application requires. The most common for Ruby are rake(build tool) and bundler (dependency manager). We’ll also be using a utility called rack that helps us manage web servers. Code Anywhere containers that have been provisioned for Ruby development have these tools installed by default. You can check this by running these commands:
bundle --version
rake --version
rack --version
That’s not a typo — you invoke bundler (the name of the library, a noun) with the command, bundle (a thing to do, a verb).
We’re going to use these tools in our development environment because our production environment will be provisioned with exactly the same tools. They are, therefore, part of the definition of our delivery pipeline. It also means whatever we do in the development environment is highly likely to work the same way in the production environment.
So, your first bit of code will be a configuration file for bundler. The name of the file is Gemfile (with no extension), and it lives in the root directory of the project. When you cloned your Github repo, git placed it in a subdirectory with the same name as the project. If you named your project playservice like mine, then you’ll find a directory under your workspace on Code Anywhere named playservice. Change to that directory now. (If you used a different name, type that name instead of “playservice”.)
cd playservice
Now go to the File menu in Code Anywhere and choose New file.
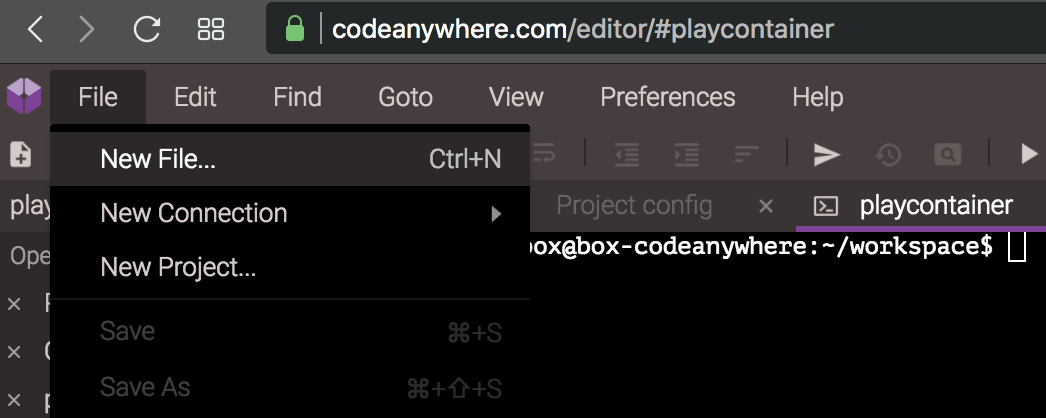
It will open an editor tab in your browser window. It won’t ask you for a file name until you save. Type the following code into the new file:
source 'http://rubygems.org'

gem 'sinatra', '1.4.8'
gem 'thin'

group :test do
  gem 'rspec'
end
In case you’re unfamiliar with Ruby, here’s what those specifications mean. The source specification tells bundler where to go look for the libraries that are called for. The gem specifications tell bunder which libraries are needed. In Ruby, libraries are called gems (because a ruby is a kind of gemstone…get it?)
Sinatra is a lightweight web application framework that is well-suited for microservices. The number ‘1.4.8’, specifies the version of Sinatra that is required.
The pre-built Code Anywhere Ruby containers are not up to date with the latest versions of Ruby and associated tools. The current version of Sinatra won’t work (as of the date I wrote this). With the non-pay pricing tier, we don’t get full system administrator access to the containers, so we can’t bring the products up to date.
Don’t worry, for “real” applications a company would pay for a non-free service tier that would buy them full access to configure their containers. For the present exercise, the older version will be fine.
Thin is a lightweight web server that will be deployed with our application. It will host the microservice in production, running inside a cloud-managed virtual machine (VM).
Rspec is a tool we will use to test-drive our application code. Notice that the specification for the rspec gem is inside a block labeled test. That tells Bundler that rspec is required for test runs, but not for production deployment.
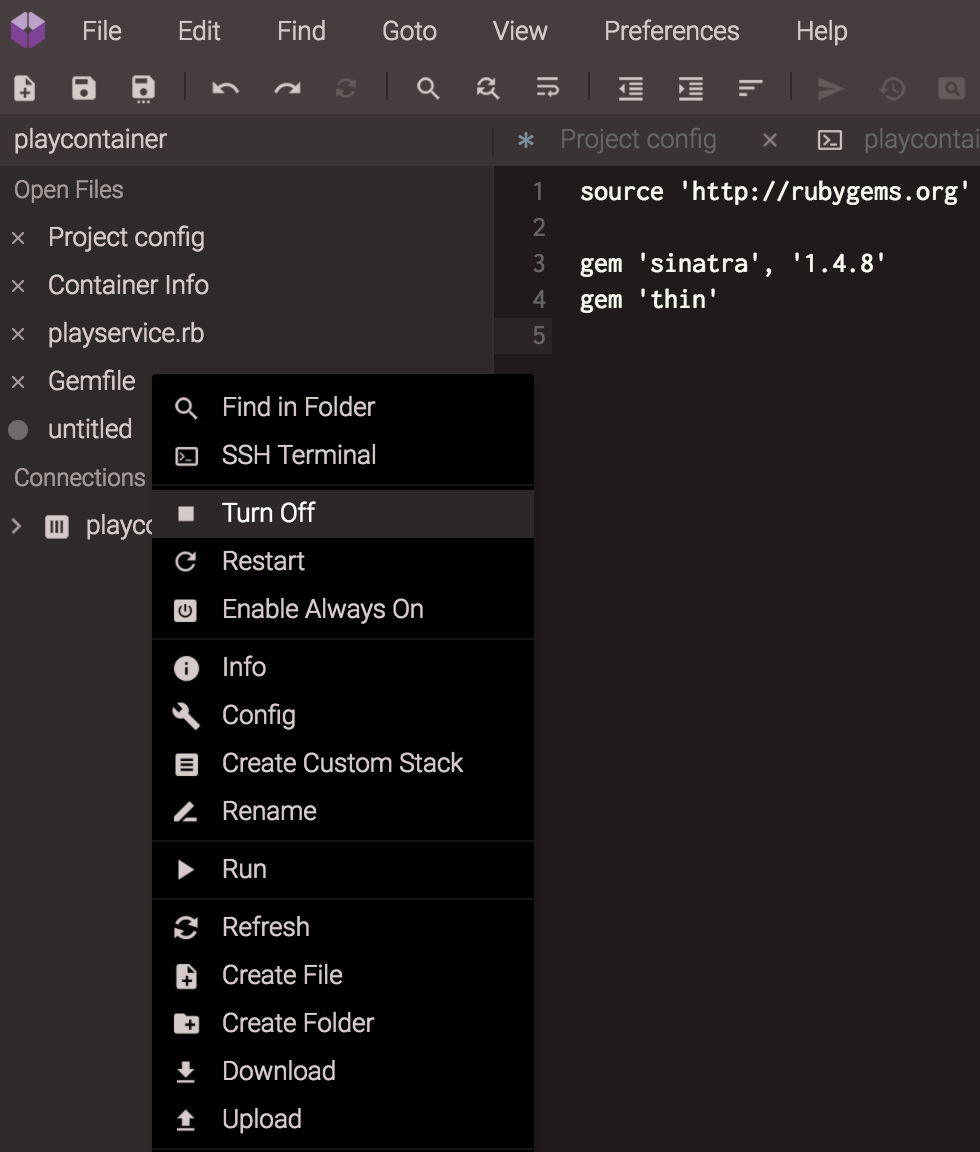
Before you save the file, you’ll have to refresh Code Anywhere’s view of the directory structure in your container. When you make directories and move things around, Code Anywhere doesn’t automatically update its view.
In the list of objects on the left-hand side of the Code Anywhere window, right-click the container name under Connections. In my case, the name was playcontainer. A context menu will open. From the menu, choose Refresh.
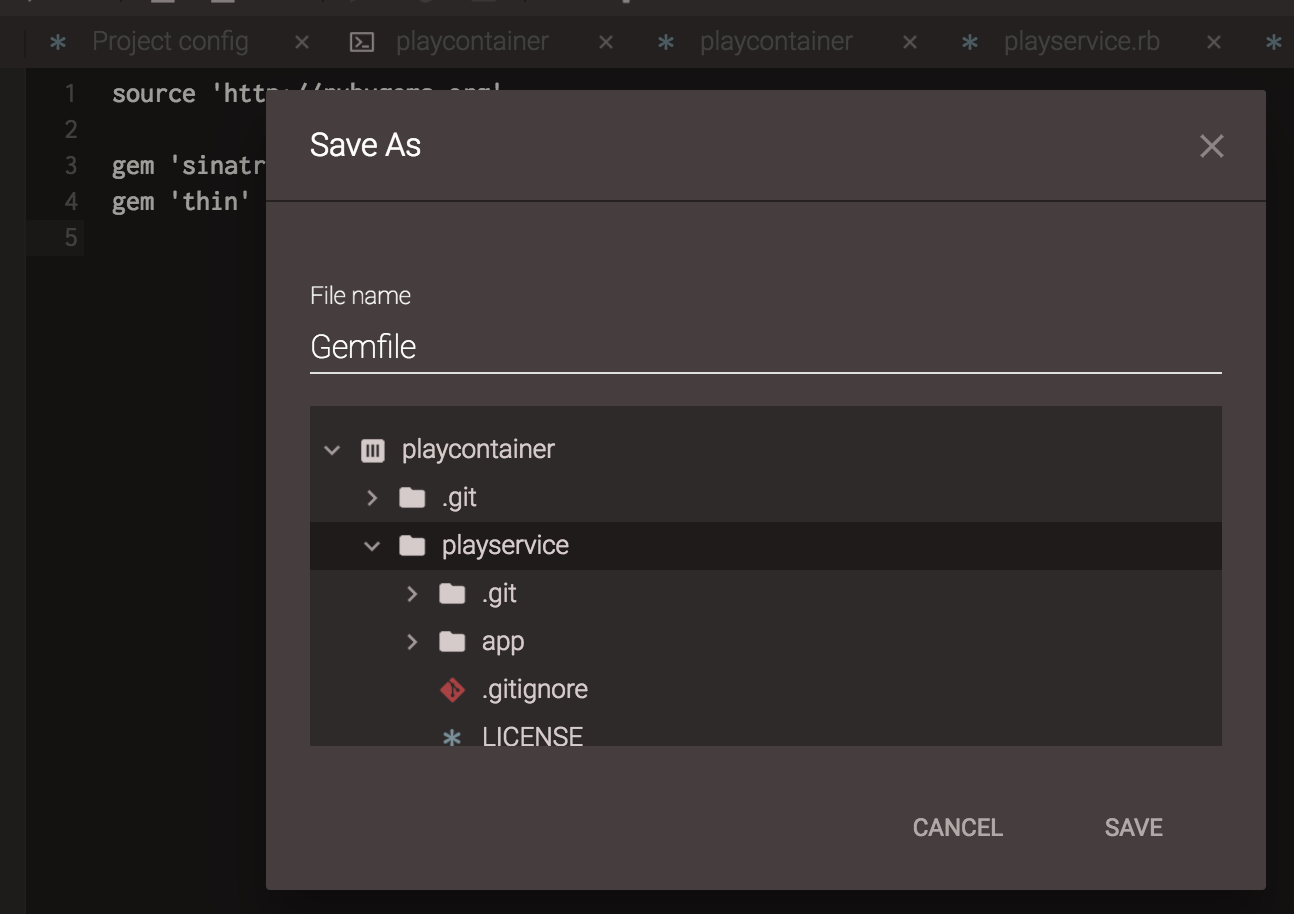
To save your new Gemfile, go back to the editor pane where you entered the data. Then click the save icon on Code Anywhere’s menu bar or press ctrl+S (command+S on Mac). Code Anywhere displays a dialog where you can enter the file name and choose where to save the file. Save the file with the name Gemfile in the root directory of your project. In my case, the root directory was playservice, right under workspace.
Now that we’ve set up Bundler’s configuration file, let’s run the tool to install the dependencies. First double-check to be sure you’re in the root directory of the project, and then run this command:
bundle install
Bundler will emit messages to the console indicating progress, and if anything fails you’ll see error messages.
Now commit your changes to version control. It’s a generally-accepted good practice to commit changes to version control frequently as we work.
This command shows you which files are currently under version control, which ones have changed, and which ones are not under version control.
git status
When you run it, you’ll see output similar to this:
$ git status
On branch master
Your branch is up-to-date with 'origin/master'.

Untracked files:
  (use "git add ..." to include in what will be committed)

        Gemfile
        Gemfile.lock

nothing added to commit but untracked files present (use "git add" to track)
Now you need to add the Gemfile and the (generated) Gemfile.lock file to git. The command git add . (dot) is a shorthand way to say “add everything.” Then issue the git commit command as shown below to commit the changes to your local git repository. In this case, “local” means “on your Code Anywhere container.”
$ git add .
$ git commit -m "Initial commit of Gemfile"
[master fea83ff] Initial commit of Gemfile
 4 files changed, 57 insertions(+)
 create mode 100644 Gemfile
 create mode 100644 Gemfile.lock
Finally, push the local changes to your Github repository on github.com.
$ git push -u origin master
Username for 'https://github.com': neopragma
Password for 'https://neopragma@github.com':
Counting objects: 8, done.
Delta compression using up to 8 threads.
Compressing objects: 100% (6/6), done.
Writing objects: 100% (7/7), 1.05 KiB | 0 bytes/s, done.
Total 7 (delta 0), reused 0 (delta 0)
To http://github.com/neopragma/playservice.git
   afa1426..fea83ff  master -> master
Branch master set up to track remote branch master from origin.
If you visit your Github repository in a web browser, you’ll see the files you just pushed there.
It’s a good idea generally to commit and push frequently to keep your changes in sync with other changes other people might be making to the code. When working in a cloud-based development environment like Code Anywhere, another good reason to push frequently is so that the container can crash or be deleted (on purpose or by accident) without causing a loss of your work.
From now on, when I say…
==> Commit! <==
…I mean “commit and push.”
Step 5: Configure the Run Utility
Next, we’ll write a configuration file for rack. We want to use rack to start our web server, because that’s the way it will be started in production.
Create another new file, and enter the following data into it:
require './app/playservice'
run Sinatra::Application
Save this file in the same directory where you saved Gemfile and name it config.ru.
==> Commit! <==
What’s Next?
Still hanging in there? Good!
At this point we have a project defined on Github and a development environment on Code Anywhere. In the next instalment, we’ll test-drive the code to satisfy our first Story and complete the build-out of the delivery pipeline.
See you then!