Project for the Web was first released in 2019. Since then, Microsoft has continued to add new content to this lightweight project management application on a regular basis. In fact, feel free to take a look at the blog post with a video that I created back in November 2020 about the new Export to Excel feature in Project for the Web.
Microsoft has recently announced the new Export Timeline to PDF feature that will assist users with project reporting. To access this new feature, complete the following steps:
1. Navigate to Home page of your organization’s Project for the Web.
2. Click the name of a project to open it for editing.
3. Click the Timeline link at the top of the page to apply the Timeline view to your project, such as shown in Figure 1.
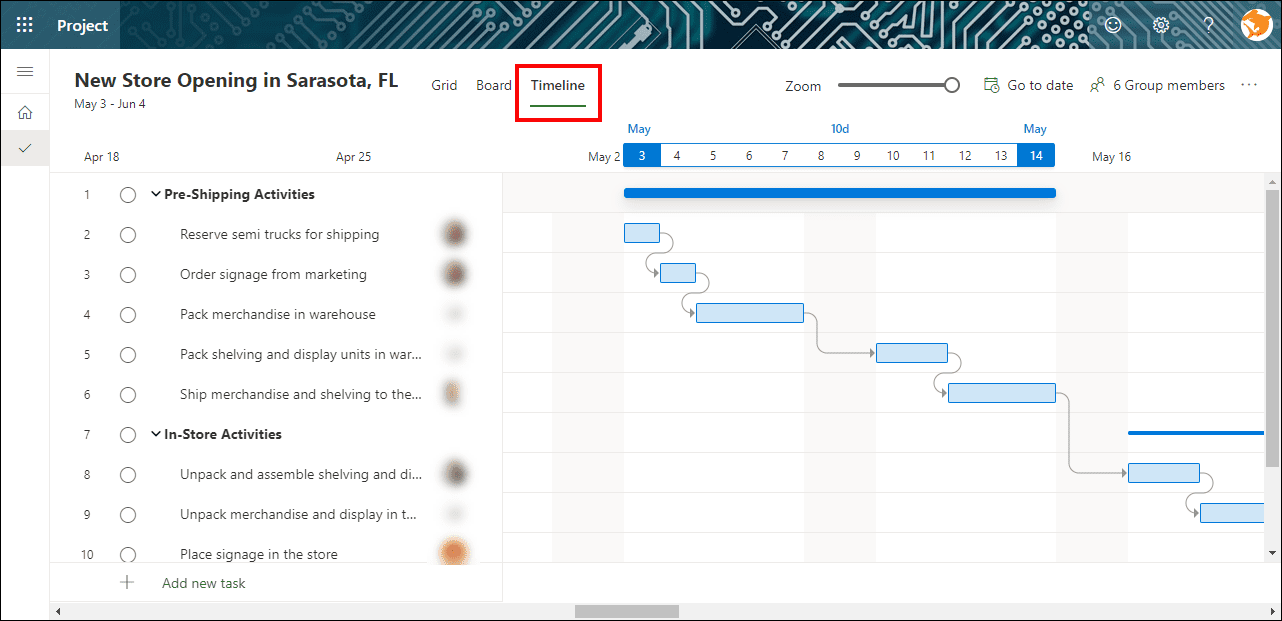
Figure 1: Apply the Timeline view
4. For best results, click the Zoom slider at the top of the page and set the level of zoom to either the 2-Weeks level or the Monthly For example, notice in Figure 2 that I set the zoom to the 2-Weeks level. Completing this step will generate a more useful PDF document in the export process.

Figure 2: Click the Zoom slider
5. In the upper right corner of the page, click the More actions button (the … button) and select the Export Timeline to PDF item, such as shown in Figure 3.
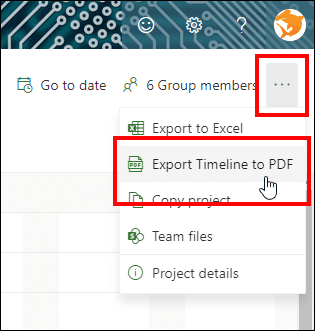
Figure 3: Select the Export to PDF item
The system begins the process of creating the PDF document, and when completed it displays a button for the new PDF document at the left end of the Status bar, such as shown in Figure 4.

Figure 4: Link for the PDF document
6. In the newly-created PDF button, click the pick list arrow button (the ^ button) and select the Open item on the popup menu, such as shown in Figure 5.
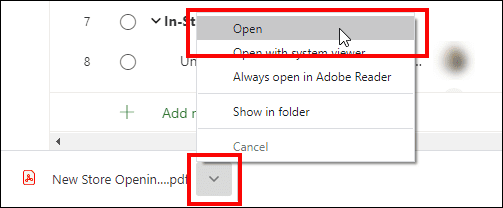
Figure 5: Click the Open button
The system opens the PDF document in your web browser, such as shown in Figure 6. The system saves the exported PDF document using the same name as the project, and displays in the project name in the upper left corner of the document. The exported PDF document displays the Name, Assigned to, Start, Finish, and % Complete columns on the left side of the page, along with the timeline of the project on the right side of the page.

Figure 6: Exported PDF document
Warning: For best results with the export process, I strongly recommend that you set the level of zoom so that you can view the entire project schedule without scrolling right and left. If this is not possible, you may find that the resulting PDF document is practically unusable because of how the export process breaks the Timeline view into multiple pages in the PDF document.