 Imagine putting a fifty-piece puzzle together that depicts an overview of a typical project. Each puzzle piece is like an artifact or one of the tangible by-products developed during the timeline of a project. The center piece is the project plan, and other pieces that could snap into the center piece may be the project’s charter, a communications plan, and/or a staffing management plan. Those pieces would have other pieces snapped into them like the checklist estimation, a risk assessment worksheet, contacts, lessons learned, and so on until all the pieces interlock into a completed puzzle. Managing projects means keeping track of information stored in different places and from different types of files. It would be more efficient if most of this inter-related data was accessible through one central project plan, so that the project manager and all team members had one place to go to find information! Let’s look at some different ways project artifacts can become easily accessible through MS Project.
Nice Notes
In the Task view, double-click on a task to see its Task Information dialog box and to select the Notes tab. You can copy data from another program and paste it into this area, as needed. A good example of this is shown below in Figure 1. Notice that two lines were copied from an Excel spreadsheet and pasted into the Notes area preceded by a text line. The same can be done within the Resource Notes and Assignment Notes fields.
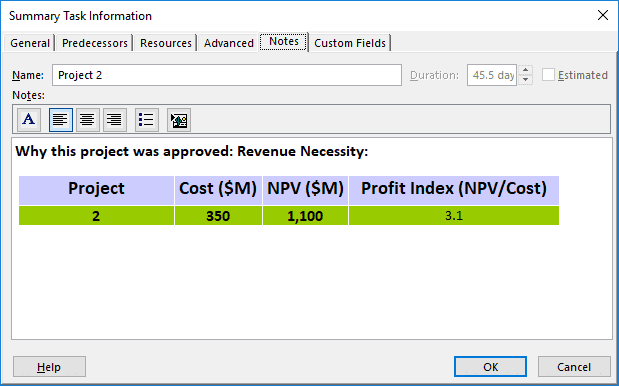
Figure 1: Task Information – Notes Area
Once you add a note to a task, the task’s Indicator cell (under its “I” – column header) displays a sticky note icon (this also applies to Resource Notes and Assignment Notes). To see a note’s contents, hoover your mouse over the icon. You can also link and embed objects in the mentioned notes areas. This is covered in more depth below.
Linking
Linking a file means that the data remains in the source file, but can be seen in the destination file or within, for the sake of example, Project. Linked objects will be updated automatically if the recipient(s) have access to the externally linked files. If this is not the case, the user will see an error message instead. When you double-click a linked object, the source program starts, and you can update said links if needed.
To develop our Note link, we would select the last dialog box from Figure 1 (under “Notes:” and above the notes area), which is the Insert Object button. We then see something similar as is displayed in Figure 2 below. Notice that, by default, Create from File was chosen and the location of the chosen PDF file selected. Be sure that the Link and Display As Icon boxes are checked. If you are doing this for the first time, read the Result definition. When you’ve inserted your link, click OK to see the outcome (as shown in Figure 3). As mentioned, double-click the linked object to open it. Other types of links include that of internal dependency between tasks in the same project plan and external dependency (or cross-project dependency) of tasks in different projects.
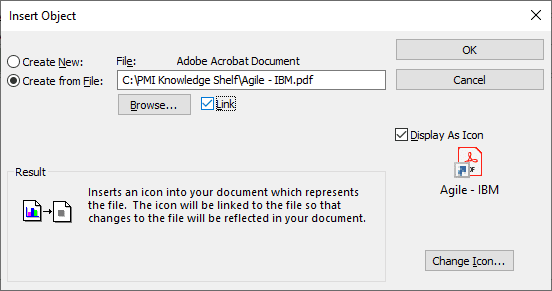
Figure 2: Insert Linked Object (Icon has an Arrow)
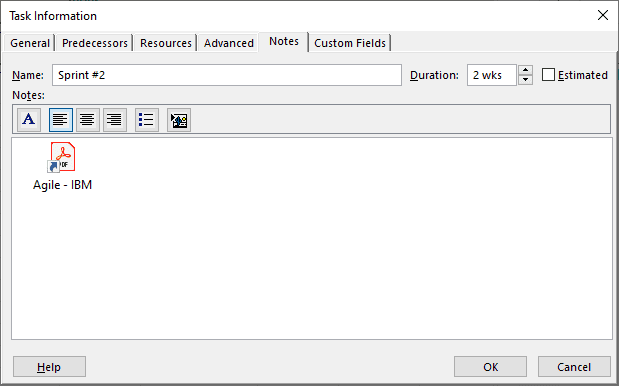
Figure 3: Linked Object in Notes Area
Embedding
Embedding is similar to the above mentioned copying function, but it’s a copy of the source file and you won’t be seeing updates made on the original. When you work with entire files, the linking and embedding steps are almost identical. The exception is that the Link box will not be checked (see Figure 4). Embedding objects is a good method to use when you have a wide distribution of people that don’t have access to your files.
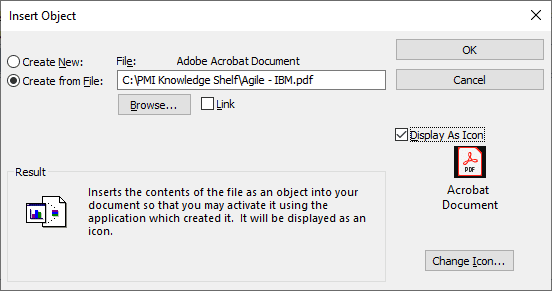
Figure 4: Insert Embedded Object (Icon has no Arrow)
Hyperlinks
Project has another type of link. It’s called a hyperlink, and sometimes referred to as a live link or hot link (for example, you can link to an Excel spreadsheet, a Word document, a web page, an email address, etc.) Note that you can only have one hyperlink for each task, resource, or assignment. If needed, you can add additional hyperlinks or links in the previously mentioned Notes areas.
To create a hyperlink, right-click the task, resource, or assignment, and then choose the last item listed on the shortcut menu (hyperlink or link). Select the type of data you want to Link To, and then select the folder you want under the Look in section, select your file, and click OK. Figure 5 shows the Insert Hyperlink dialog box. When you use this function, the Indicator cell displays a globe with links of a chain. Hoover your mouse over it to see the contents, and click it to open the hyperlink file with its associated program. If you don’t have the Indicator column showing, right-click the task, resource, or assignment. From the shortcut menu, select the last item (hyperlink or link) and then Open.
There are many ways of viewing all the hyperlinks within a plan. You can insert the Indicators or Hyperlink columns or go to the View tab’s Data section. From the View tab’s Data section, select Tables > More Tables > Hyperlink (default is Task, but you can select Resource), and then finally, Apply. The generated table will show all the Hyperlinks with their addresses. If a task or resource has no associated hyperlinks, only their names will be displayed.
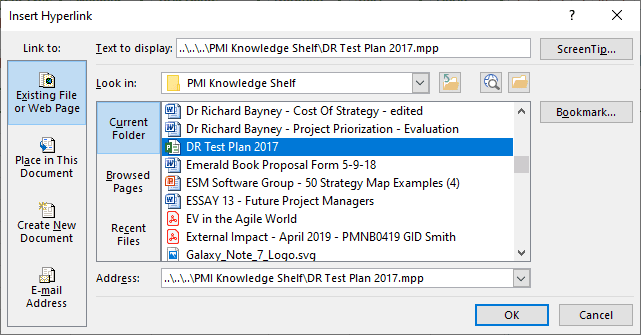
Figure 5: Insert Hyperlink Dialog Box
Summary
I have shown several ways of linking/embedding project by-products within your project plan. Hopefully, you can try these methods and will be one step closer to having a main source of information for your projects. A cornerstone for doing this is using the Notes area. You can also use Notes as a mini-project diary (or electronic notebook) of events that are happening in your project. For example, you could have a dated comment that a person gave two weeks’ notice and is going to be replaced with the Resource Notes area. For WBS 1, you could embed the project’s charter, and for a Lessons Learned task, you could link the appropriate document to be updated throughout the life of your project.
What are some of the ways you are using the mentioned tools for putting more information into your project plan? For example, you may be embedding partial files or a Visio workflow diagram in the Gantt Chart timescale.