
A resource pool can help you see how resources (i.e., work or materials) are used across multiple projects, so you will be able to track costs per plan, as well as the cumulative costs across multiple plans. Maintaining a resource pool can also help you identify which resources are over-allocated or under-allocated across multiple projects. Project plans that are linked to a resource pool are considered sharer plans. A resource pool is exceptionally beneficial when you are working with other project users across a network. As such, a resource pool should be stored in a central location such as a network server. Sharer plans can be stored locally or on a network server.
Creating a Dedicated Resource Pool
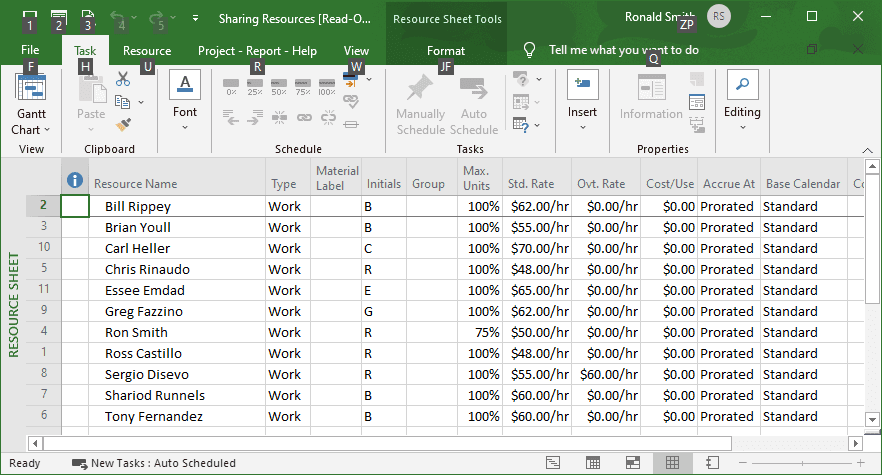
In creating a resource pool, it’s best to begin with a project plan without any tasks (which have end dates). Go to the View tab > Resource Views > Resource Sheet, and fill-in the fields for Resource Name, Max Units (percentage of time the resource is available), costs, etc. See Figure 1 for an example. When complete, save the resource pool to a central location, and use a clearly identifiable name, such as Sharing Resources, so people know it’s a resource pool.
If your resource information is in other programs like Excel, you can save time by importing or pasting that data into the Resource Sheet table. Just make sure the Excel worksheet column matches the MS Project column (i.e., Resource Name or Std. Rate) in the Resource Sheet table.
Linking a Project to a Resource Pool
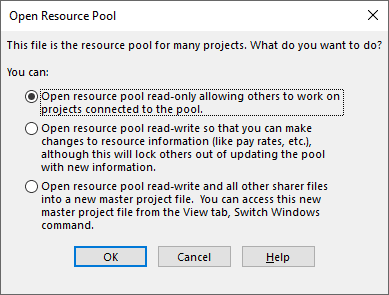
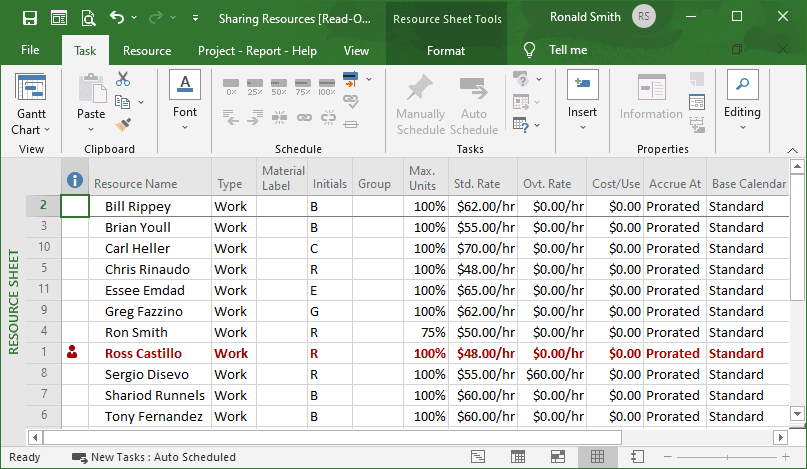
In MS Project, open the shared resource pool file as a read-only file, so you don’t lock anyone out from using the file and click OK. See Figure 2. Only select read-write (the second option) to make needed resource changes (i.e., pay rates). You’ll want to do this quickly because no one else can access the resource pool while you are using it. If you make changes, update the resource pool by navigating to the Resource tab > Resource Pool > Update Resource Pool.
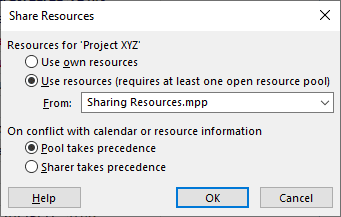
When you’re ready to link a project to your resource pool, open the project file that needs access to the pool. When starting a new plan, link the standardized names from the resource pool to your plan’s Resource Names field. In the Resource tab’s Assignments section, go to Resource Pool > Share Resources. You will see the Shared Resources dialog box as shown in Figure 3. Select the Use Resources option, and, if necessary, select the resource pool file and click OK.
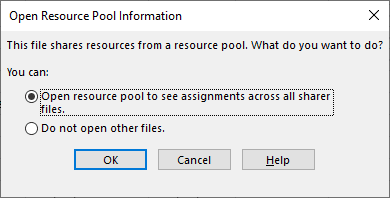
If, later, you open a sharer file, MS Project will ask if you want to open its’ resource pool (if it’s not already open), and, in most cases, you’ll want to open it, as shown in Figure 4, and click OK.
Seeing Assignments Across Multiple Plans
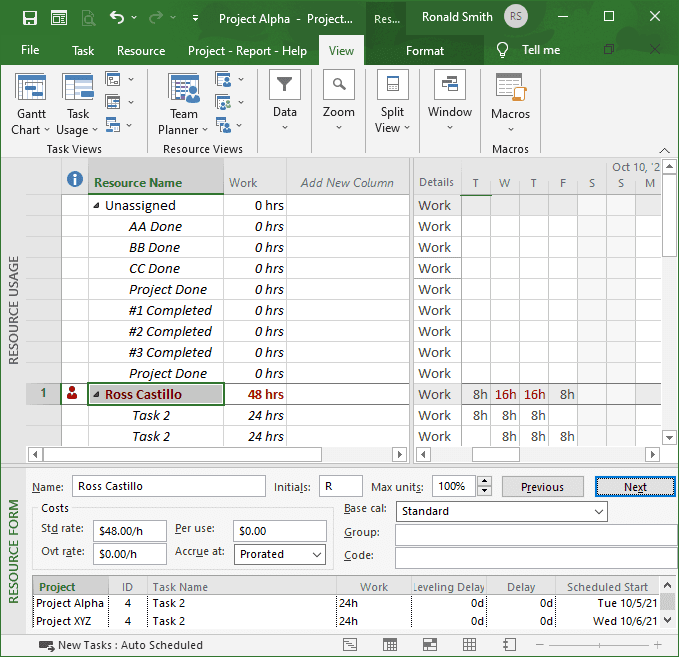
One of the benefits of using a resource pool is to examine the details of resource’s assignments and allocations. To do this in MS Project, open your Resource Pool file and then your sharer plans. In the last sharer plan, you want to pull-up the Resource Usage screen by going to the View tab > Resource Usage. Then, under the View tab > Split View, check the Details box to get the Resource Form as shown in Figure 5.
In the combination view, you’ll be able to see all the resources in the upper pane, as well as the selected resources’ details in the lower pane. In Figure 5, you can see that in both panes “Ross Castillo” is highlighted. His name is in red in the upper pane because the icon in the Indicator (i) column shows that Ross is overallocated (working 16 hours on Wednesday and Thursday on the timescale). Why? If you look at the bottom pane, you will see he is scheduled to work full time on those two days on both the Alpha and XYZ projects. This overallocation in the refreshed Resource Pool is shown in Figure 6.
Summary
There are other ways of finding resource overallocations in MS Project, but the ones presented in this article outline a particularly good approach. The view shown in Figure 5 is a wonderful way to see the big picture of a resource’s assignments and allocations. If you press the “Next” button in the lower pane (top right-hand corner), both panes will automatically go to the next resource on the list. Finally, there are many ways of fixing overallocations and maintaining strategies for addressing them (leveling resources, using an under-allocated resource, and/or reassigning a task to another resource). Any related comments would be appreciated.