Schedule a demo of LiquidPlanner with a product expert today


Previously, we discussed the onboarding and adoption stages that companies go through when they integrate LiquidPlanner into their daily workflow. This week, we’ll be covering the third and final stages: refining and optimizing the LiquidPlanner experience.
Refining
The refining stage tends to kick in once you’ve been using LiquidPlanner long enough to focus on proactively managing project risk. LiquidPlanner has a few tools to help you with that: deadline risk alerts, critical path highlighting, and max effort alerts.
Deadline Risk Alerts
When your projects have deadlines, you want to capture that as a deadline date in the project edit panel. Your deadline date will drive alerts if your project is at risk of missing that deadline. The nice thing is that these alerts will appear well in advance of the deadline date, so you have plenty of time for course correction.
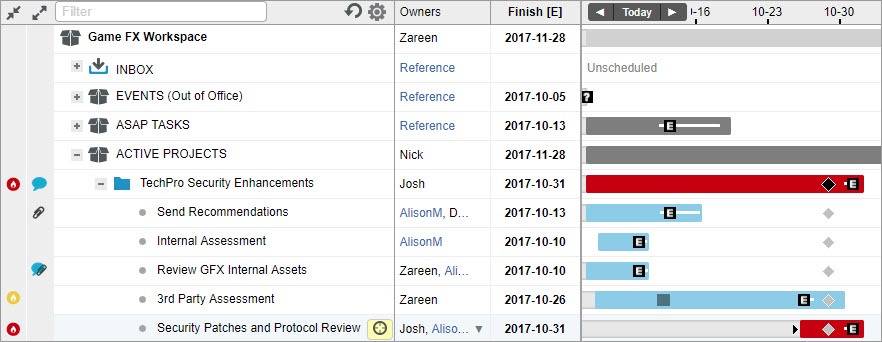 When you add a deadline to a project and refresh LiquidPlanner, you might see the project schedule bar turn red. If this happens, a red flame will also appear in the left margin to alert you that the project will not be completed by its deadline date.
To determine why, expand the project and look for red tasks, the ones that are going to miss the project deadline. Your first reaction might be to reassign the work to resolve the risk. Sometimes that is a good solution.
Sometimes, however, tasks are dependent on higher priority work; even with a different owner, these tasks would still be subject to the constraints of their dependencies. When that happens, you need to think about what is else is going on.
Critical Path Highlighting
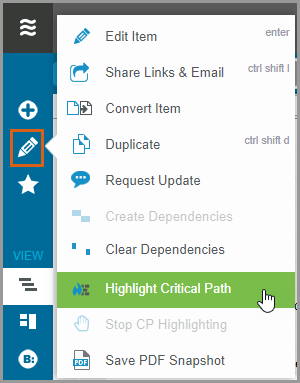 LiquidPlanner lets you highlight the critical path for your projects. Critical path highlighting will show you all of the tasks that are driving the end date of a project.
When you highlight a critical path, one of the first things you might notice is that several of the project’s tasks are actually in other higher-priority projects; this is very typical when you are sharing resources across multiple projects.
The takeaways here are first that the resource who is in the red is not always the root cause of your risk. Secondly, don’t forget to take advantage of the insights available from critical path highlighting.
Max Effort Alert
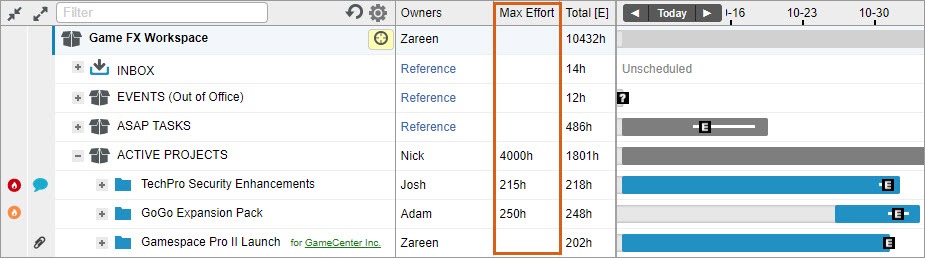 The max effort alert is very useful when you’re contracting with clients for a fixed number of hours.
Using the Max Effort field in the Project Edit panel, you can set a limit for the number of hours allotted to a project, such as 50 hours, for example. When you’re forecasted to exceed your Max Effort limit, a red flag will appear in the left margin.
Optimization
The final stage is optimization. When you reach this stage, you are confidently managing your project schedules and staying on top of schedule risks. In optimization, you are seeing where you can grow, expand, and accelerate. This phase covers how to use baseline reports to better plan for your next year of projects, how to use project costing to see how much you spend on your projects, and how to manage those pesky change requests.
Baseline Reports
Let’s start with optimizing your project templates. After a year, you’ll have a lot of data regarding how much time you actually spent on projects versus what you originally projected.
Pulling a baseline report from the Analytics tab, you can filter to a specific project. You might find it practical to filter to one project because you’ll know all of the data you’ll be comparing will be around the time you scoped this project and each of these tasks.
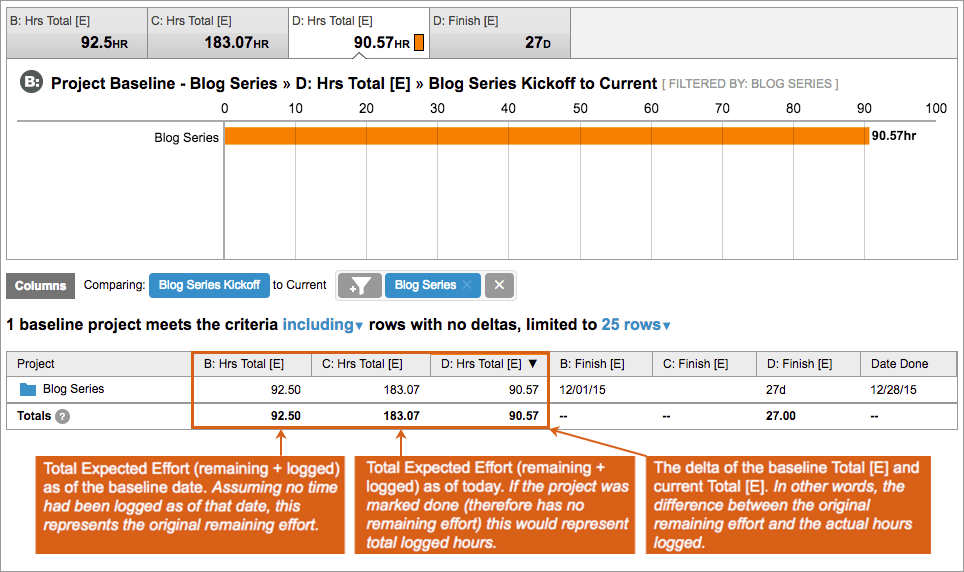 The baseline report compares the actual outcomes of the project against your original projects. The C is the current or actual, the B is the baseline calculation (what was projected when the project was originally set up), and the D is the difference calculated between the actual and the baseline value.
You can gain interesting insights from these values. For instance, you could see that a particular task took much more time, validating something you’ve noticed for a while. You can then use the information to update your project templates or statement of work documentation so the projections to your customers are more accurate.
The key is to use the data in LiquidPlanner not just to find something interesting but to also improve your projects where you can. Baseline reports can really help you optimize and refine your inputs.
Project Costing
Another area where you can see how much you’re investing in projects is project costing. Project costing is easy to do in LiquidPlanner if you have a handle around the various costs that go into your project.
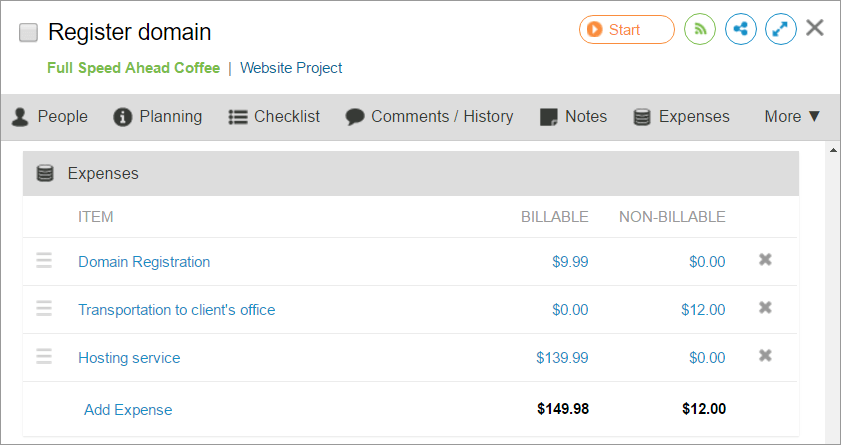 In the Enterprise edition of LiquidPlanner, you can enter your various project expenses, including hardware and materials, subcontractor costs, and travel costs, and you can deem those expenses as billable or nonbillable. You can combine those expenses with the labor hour rates that you calculate within LiquidPlanner.
With LiquidPlanner’s rate sheets, you can input the various rates for the work your team does. If you’re very meticulous about project costing, you can input fully burdened rates to cover overhead employee expenses like benefits.
The input from your expense data, along with your labor hour rates, can be calculated in an Analytics report. You can then see how much a project costs in total by paid hours of work logged and can include expenses to get a total value for the cost of the project.
Change Requests
A major factor that tends to drive up projects is change requests.
If you’re struggling with how to keep track of change requests on your projects and the effects they have on the outcome of the project, you can create a project dashboard and add a notes widget to your table. In this widget, you can include details like who submitted the request, what the effect is on the project, and whether the change request is approved, in consideration, or rejected. This is a helpful way to keep track of pesky change requests and can be useful when you’re doing a lessons-learned project retrospective.
Expert Status
Once you’ve completed these four stages of LiquidPlanner integration—onboarding, adoption, refining, and optimization—you’ll be an expert at using LiquidPlanner to manage all of your workflows.