Double Grouping Report Results
A new function release by Hub Planner: How to activate a secondary grouping of report results.
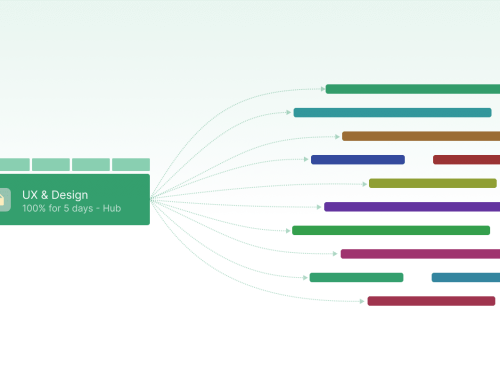
It’s the gift that keeps on giving. Hub Planner adds yet another new function release to Reports. Now, users can opt to add a secondary grouping option to reports. Grouping can be useful for breaking a large amount of data into manageable chunks or for collapsing data into expandable groups.
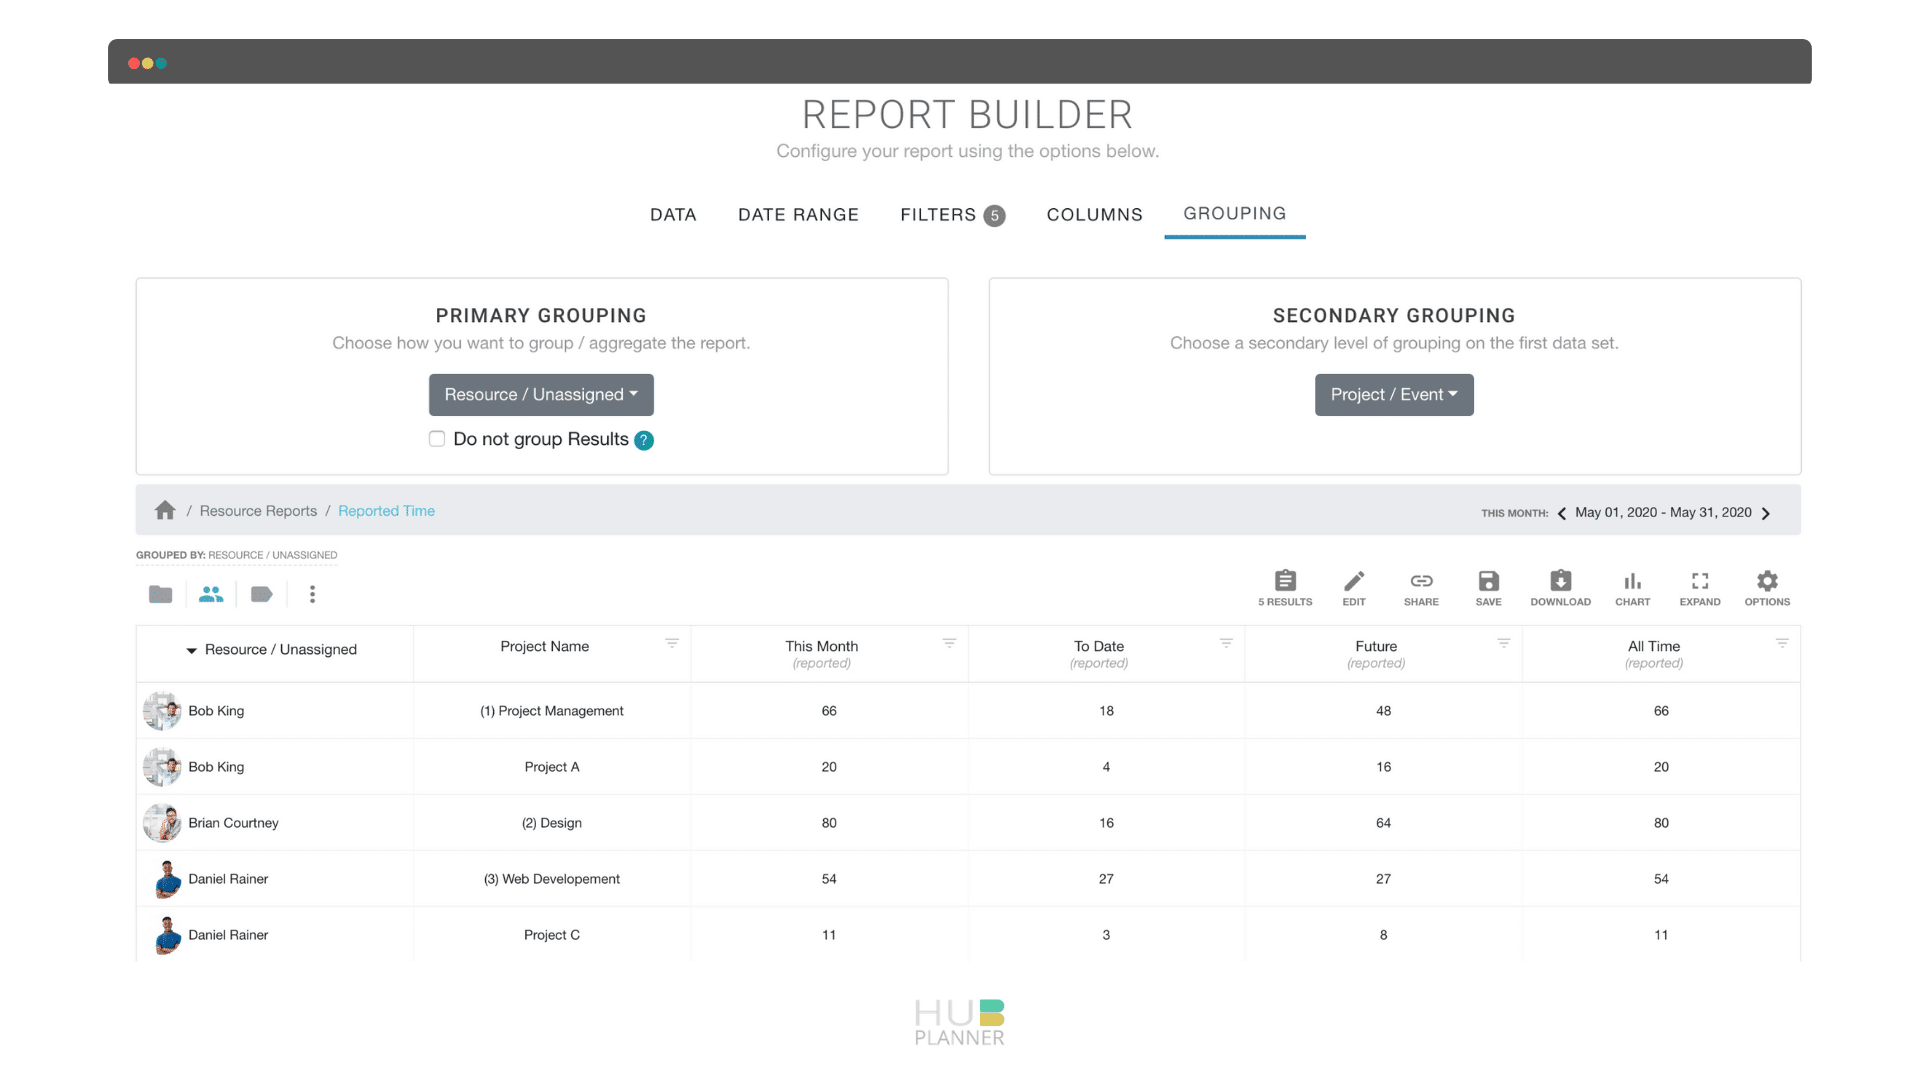
As the title suggest, previous to the new function release. Hub Planner reporting allowed for grouping by one singular primary option. Now, you can add in a double option to group reports by. For example. Previously if I chose a Project Scheduled Time report, I could opt to group my report results by a number of different options including Resource, Custom Field, Event, etc. Say I choose Projects and Events. Now, I can add a secondary grouping option by Resource and Unassigned. This will activate the double grouping function. By adding a double grouping, I can see a further breakdown of resource time on the projects all on the one page. Now my project Scheduled Time report will be grouped primarily by Projects and secondarily by Resource and Unassigned Work. A good idea is to save the report for future access.
Why use Grouping and Sorting?
Multiple Level Grouping and sorting in Hub Planner reports allows you to optimize analytics by categorising and breaking down the report results for access to further information about projects and resources. Report analytics are super helpful in forecasting resource time and project planning. Being able to determine and forecast the resource requirements mid project and future plans. Seeing a dip or a road block mid project. Use the report analytics to make quick strategic decisions to steer the project back on track.
- Do you need to add more contractors?
- Are resources over scheduled?
- What resource groups are under utilized?
- How are my NY Design Team optimized next month?
- What resources are available?
- Show me a weekly heat map of active resources scheduled time this quarter.
Hub Planner allows you to easily sort and group report data within a simple few clicks.
Group & Customize Reports for Optimal Results in Resource Management
Use the pre formatted report templates and or add some extra data options you want to see in the report from the report builder.
Say for example we have the Resource Scheduled Time template. This will provide you with a breakdown of resource time scheduled on projects and events. Perhaps you might want to adjust this template to add in some more information and remove some existing columns. For example, add in columns that also displays the reported time, capacity, availability and the utilization rate. Giving you a complete overview of resource time and availability.
Using the secondary grouping option will allow you to scale the analytics further and show a breakdown of the information by project or unassigned wok, for example.
Hub Planner reports provides you with formatting options similar to what you would find in excel. Utilize the sorting and filter features. Even add conditional formatting to highlight important data. All of these options are available from the report toolbar.
Show me an example.
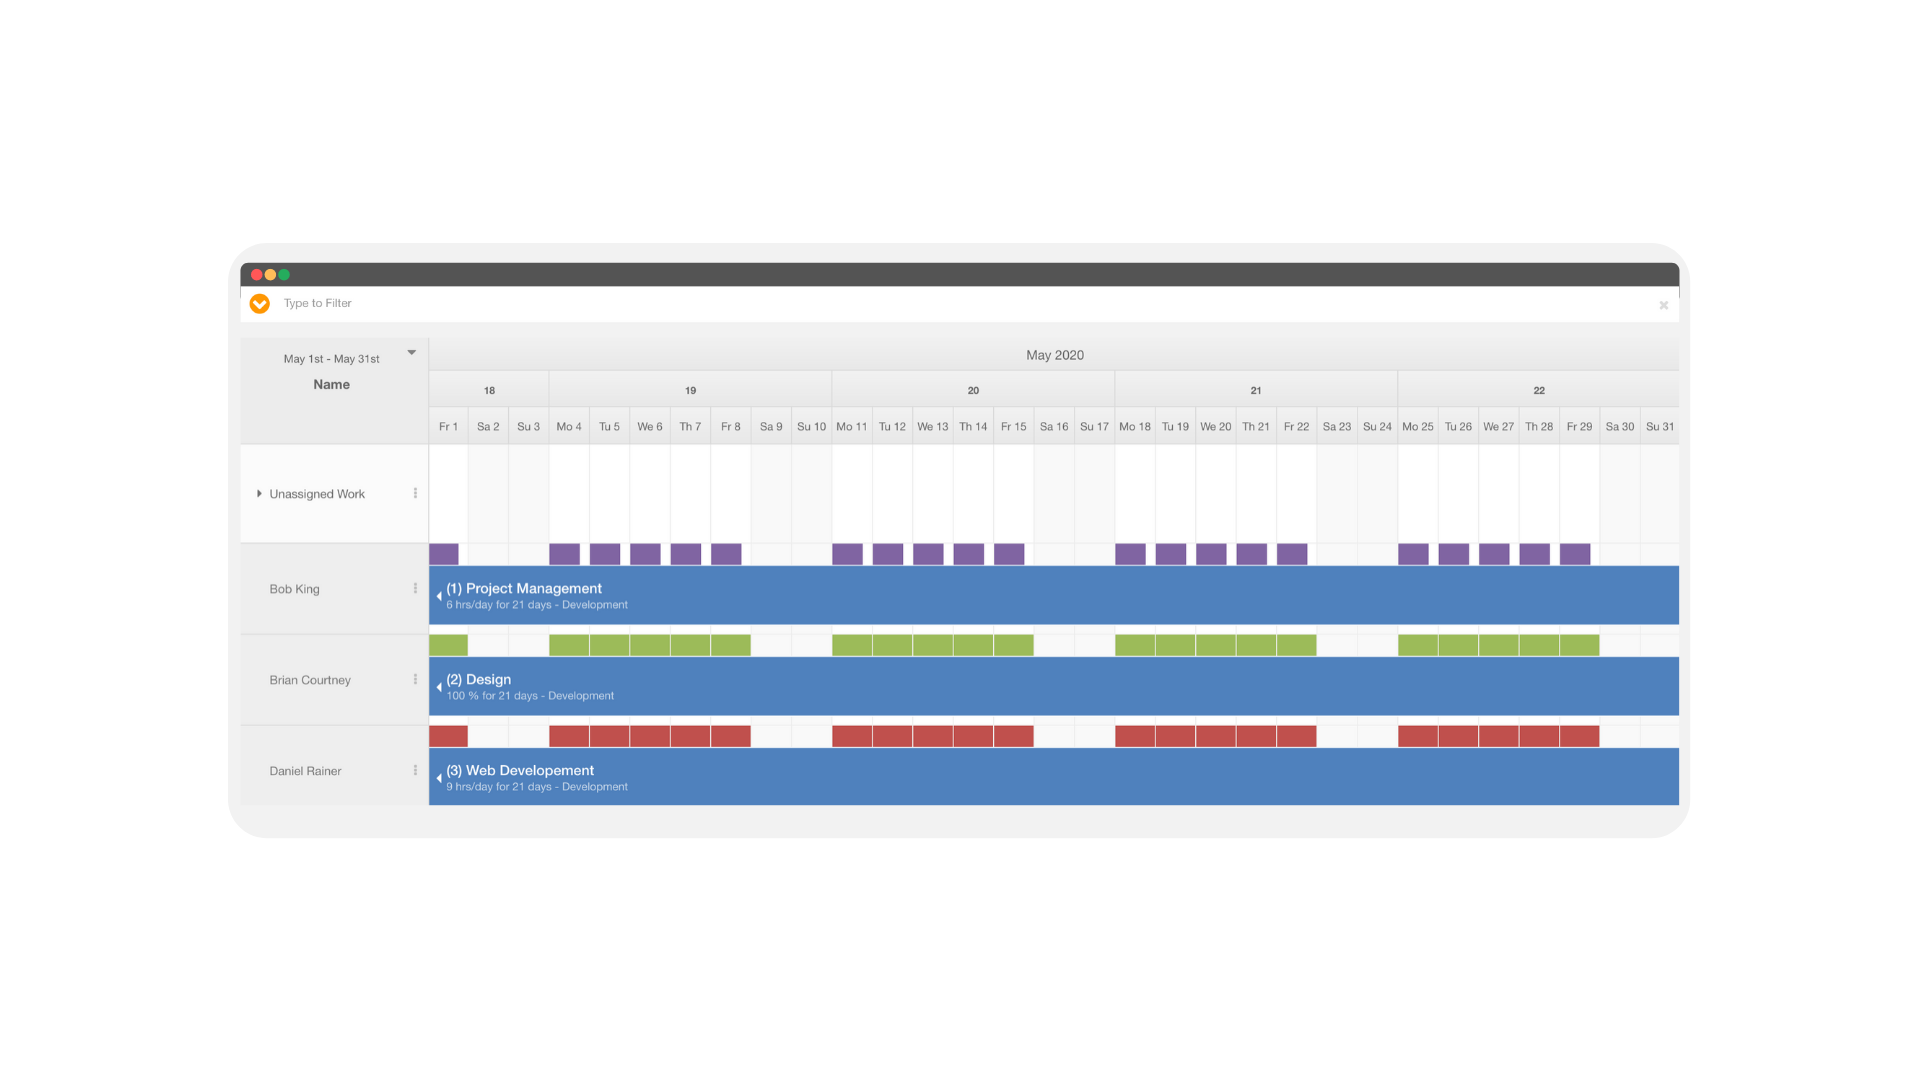
Sure. So, we will look to create a report of Resource Scheduled Time and group report results by Resource and then Project. Firstly, allow me to show you the corresponding Hub Planner Scheduler. Here you can see the detail of the resources scheduled on projects for the month of May.
- Resource Bob is scheduled for 6hrs/day on project ‘(1) Project Management for the month.
- Subsequently, Brian is scheduled on the Design project for 100% of his monthly time.
- And finally, Daniel is scheduled on Web Development project for 9hrs a day. All are scheduled for the month of May.
Also, to make it more straightforward, all are scheduled to work on the Booking Category ‘Development’.
Next, let’s create a resource report. Using the Resource Scheduled Time template with the following data column headings:
- Scheduled Time
- Scheduled Time to Date
- Resource Availability
- Capacity
- Resource Utilization
As you can see from the report below. The scheduled time for the resources over the month of May which matches and corresponds to the time allocated in the scheduler.
For transparency, we also show you the Grouping tab of the Report Builder prior to any adjustments.
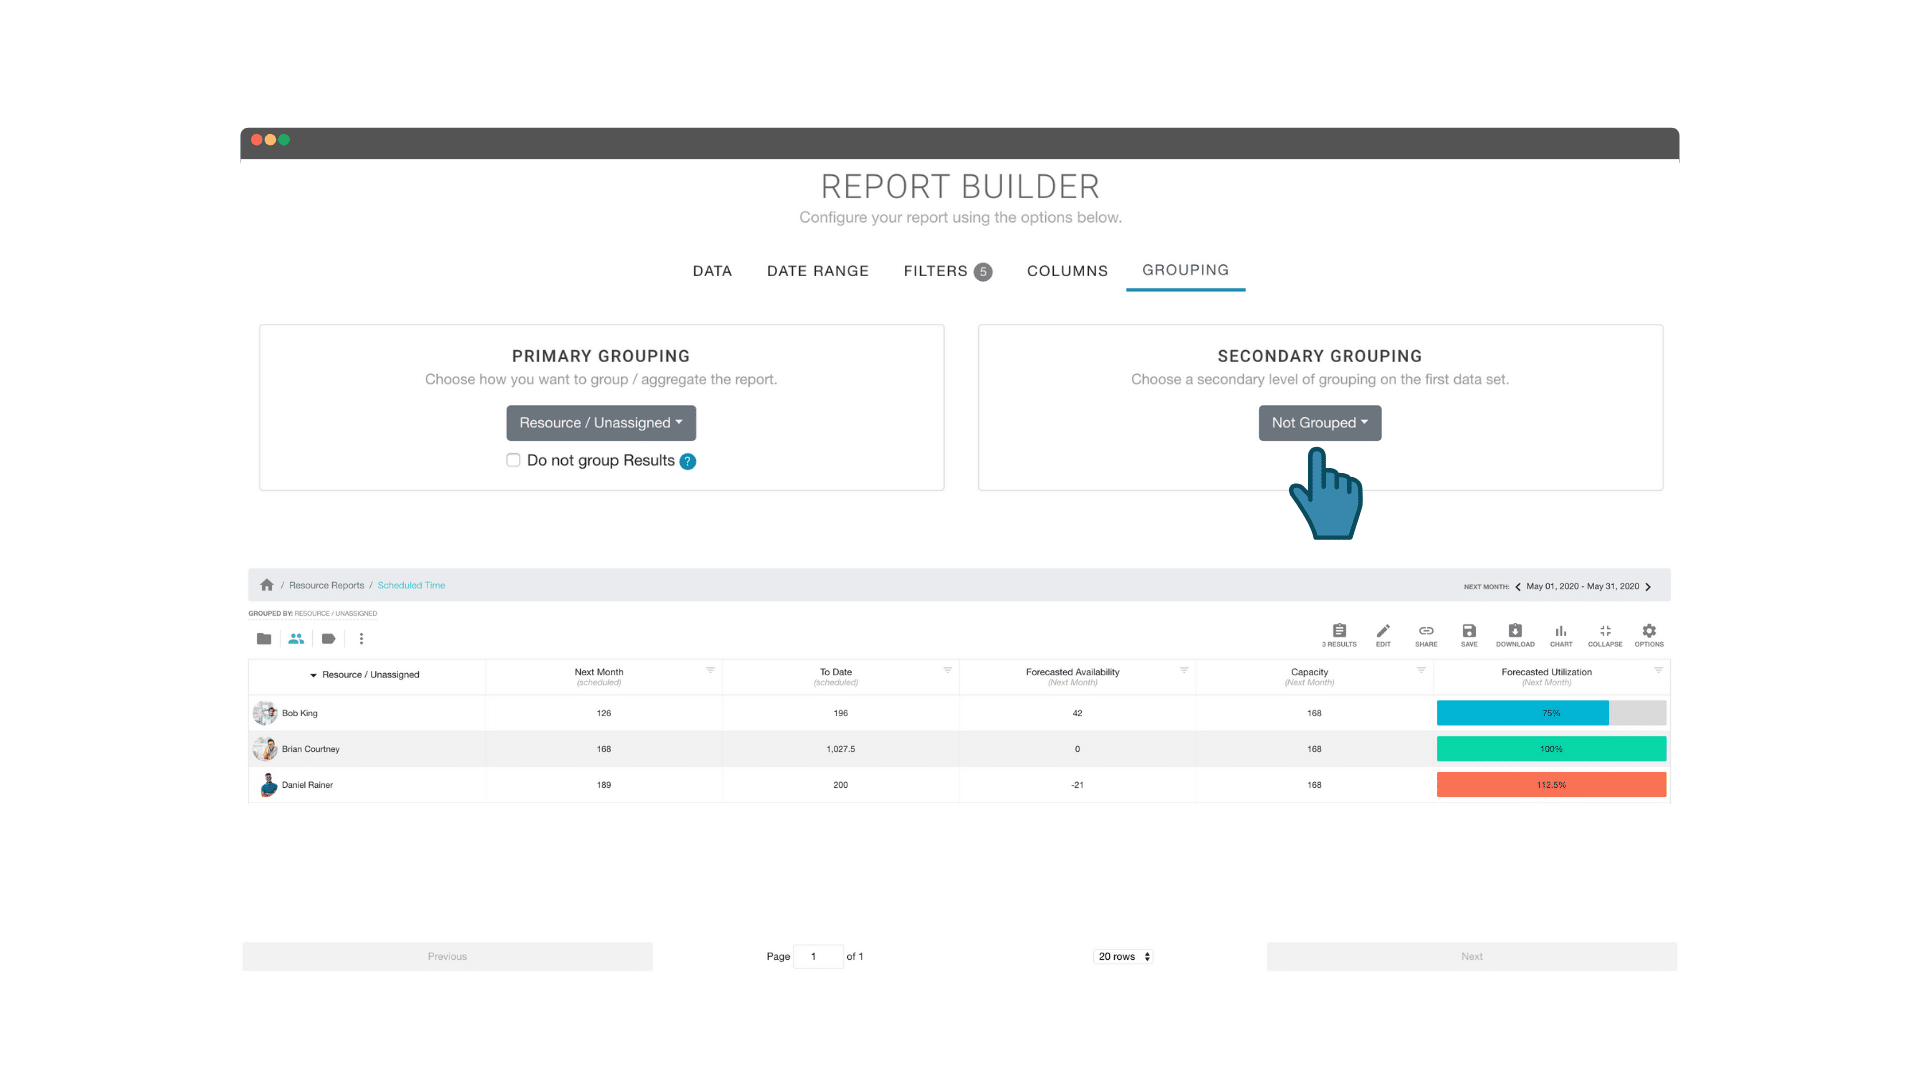
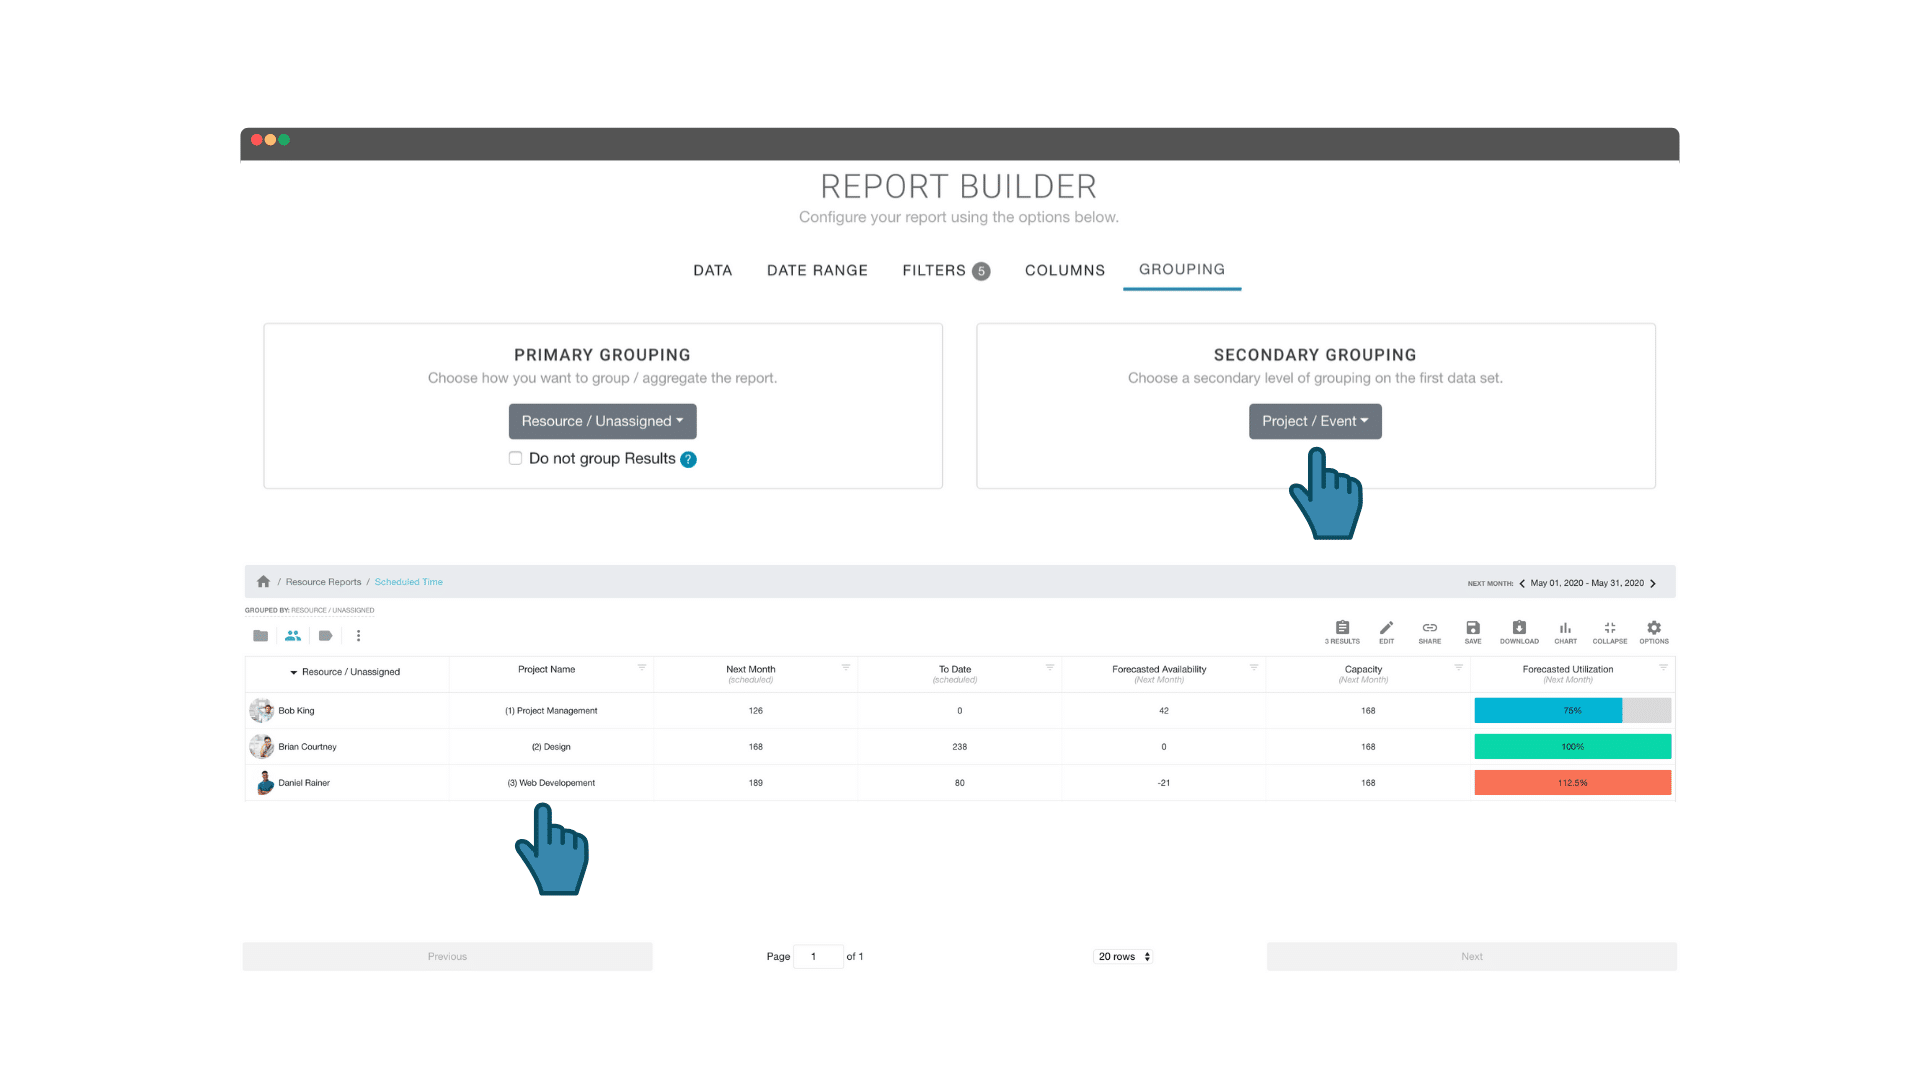
Now, navigate to the Grouping tab of the Report Builder. In the Secondary Grouping column, select Project/Event from the drop down list. This will activate the double grouping function of report results.
Note, you have a couple of ways to get to the Grouping tab of the Report Builder. Either via the Report Toolbar -> Edit -> Grouping. Or, alternatively via the quick switch icons -> Grouping.
When ready, click the update button to produce the report. Now you can see the breakdown of the resource scheduled time grouped by project. Note the inclusion of the Project/Event column in the report.
Show me an another example of Grouping Report Results.
Absolutely. We will look to create a report of Project Scheduled Time group results by project and then by resource. We will use the same schedule of resource and project time as previous.
Resource Bob is scheduled for 6hrs/day on project ‘(1) Project Management for the month. Subsequently, Brian is scheduled on the Design project for 100% of his monthly time. And finally, Daniel is scheduled on Web Development project for 9hrs a day. All are scheduled for the month of May. Also, to make it more straightforward, all are scheduled to work on the Booking Category ‘Development’.
Now, lets create a project report. You can build a report using the Report Builder or adjust a pre formatted template. In this example, we will use the Project Scheduled Time template with the following data column headings:
- Scheduled Time
- Scheduled Time to Date
- Resource Availability
- Capacity
- Resource Utilization
- Budget Status
- Budget % Consumed
As you can see from the report below. The scheduled time for the resources over the month of May which matches and corresponds to the time allocated in the scheduler.
We also show you the Grouping tab of the Report Builder prior to any adjustments. Click on the image for a closer look.

Now, navigate back to the Grouping tab of the Report Builder. In the Secondary Grouping column, select Project/Event from the drop down list. This will activate the double grouping function of report results.
Note, you have a couple of ways to get to the Grouping tab of the Report Builder. Either via the Report Toolbar -> Edit -> Grouping. Or, alternatively via the quick switch icons -> Grouping.
When ready, click the update button to produce the report. Now you can see the breakdown of the resource scheduled time grouped by project. Note the inclusion of the Project/Event column in the report. Now we have a breakdown of resource time per project.

You can navigate through the levels for more intricate information. Note, that some columns become inactive as they are non relevant to the report level. To show, let’s add in some more columns that will be relevant to the secondary grouping of the resource. Adding the following columns to the report will make them active and functional.
- Utillization
- Capacity
- Availability
Further Reading.
Hub Planner has an extensive Knowledge Base available to users. There is a whole section dedicated to Reports. Even more so, you will find an article on Grouping Reports and Non Grouping of Report Results too. Go check it out for any help.
Hub Planner Reports Feature page is also worth a look for an overview of how Hub Planner reports can help you in Resource Management.