
If you recall from the previous email management article, we covered Microsoft Outlook. While most email applications offer similar tools to manage the inbox, often they are named or presented differently.
In this article I want to go over the Gmail interface and how it differs from Outlook. A primary difference from the Outlook version is that Gmail is a web only tool, whereas in the Outlook article I covered the desktop tool.
This means the interface will operate differently in context of the menus and mouse options, and due to this, I will take a bit of a different approach to wrangling that inbox.
General Navigation
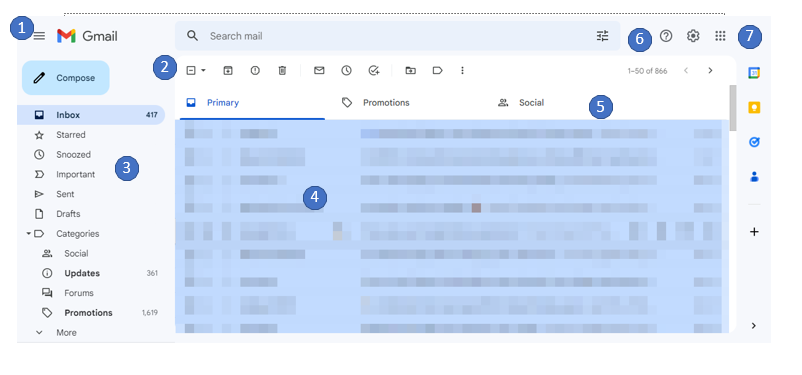
- The “Hamburger”: This toggles the side menu on/off.
- Context menu: items change depending on whether an email is selected, items such as move, delete, archive, etc. can be found here.
- Labels: Google uses a folderless structure, which we’ll discuss further in this article.
- Inbox
- Major categories: These are always primary, promotions, and social.
- Support, settings, and apps
- Email support apps
- Calendar
- Keep: Notes and checklists can be found here.
- Tasks
- Contacts
- Add-ons: There are various tools Google makes available to work with Gmail.
Searching & Sorting

Taking immediate action
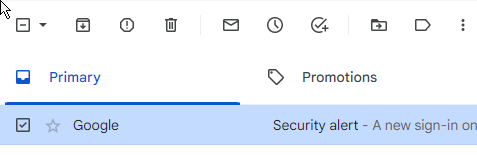
From first glance, you will notice that when selecting an email, additional functions appear to the right of that email. This is the start of taking immediate action.
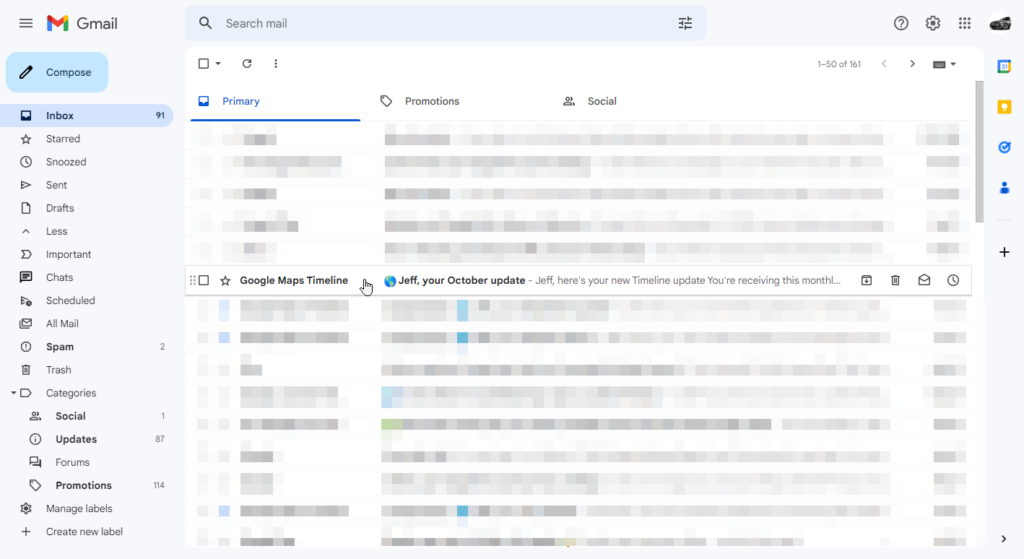
Immediate email management is key to keeping your inbox managed. As you can see here, this inbox has over 90 unread emails, which is not good, but through several steps, you’ll see we’ll bring that count way down.
In the image above, you’ll notice an email has been selected. Several control symbols are shown:
- The “waffle”: On the far left, this allows the user to grab the email and drag it to a folder, or category (ie. primary, promotional, or social).
- Selection box: This selects the email and allows the user to apply other functions (ex. delete, move, etc.).
- Starred: This flags the email for future reference and allows the user to group emails for easier searching. This is set on an individual email basis.
- Important: This flags the email or conversation as important. This trains Google to treat every email from the sender as important, and allows for easier searches.
Further to the right, there are several action symbols:
- Archive: This moves the email to long term storage, and into a specific archive folder.
- Delete: This removes the email entirely from the inbox.
- Mark as unread or read: Only one of these will display at a time. If the email is read, the unread symbol displays, allowing you to mark it as such.
- Snooze: This displays a sub menu allowing you to move the email out of the inbox and into the snooze folder until the selected time.
Searching
You can simply click in the search bar and type some text.

Just like Google, you can use some operators when searching. For the sake of simplicity, you can, for instance, search from:Bob. You can also combine searches: from:bob or from:jeff. Follow the link above for additional operators and syntax.
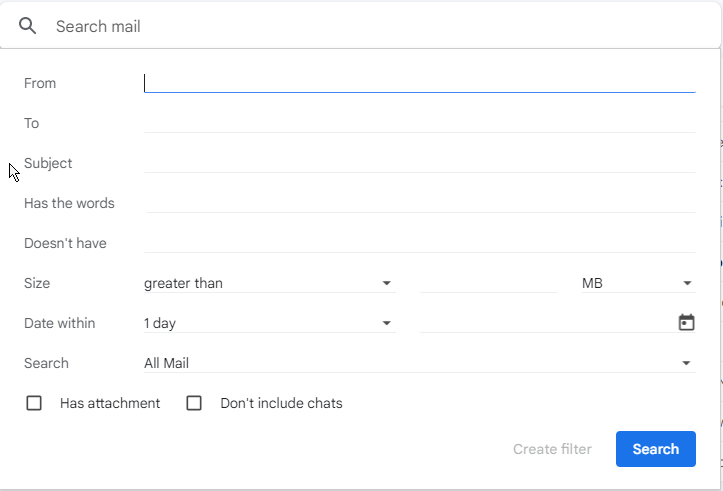
If you want to use select additional options, click on the slider symbol in the left hand side of the search bar. A new menu opens which offers several other variables to choose from.
Now let’s apply this to my inbox cleanup. In my inbox, let’s say, I get lots of emails from an organization. I can enter in the search bar from:organization, and this will display each email from them, which you can narrow down with a few other search options.

You can select the box at the top of the list, which displays the actions.
Now you can choose the action you want to apply. In my case, I’ll simply delete the emails.
Sorting
Sorting takes the identical process, but it allows the user to group similar emails based on the search criteria. For example, I may want to address emails that are over a year old. Let's sort on those, then address them.
The easiest way to handle this is to enter the following into your search bar:
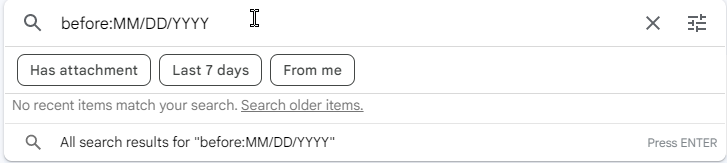
You’ll notice a sub menu appears and you can select a few options, or press enter to search, (after replacing MM/DD/YYYY with the actual date). For context, you will also be given an email count based on your page display size. Mine has 50 emails per page and many emails displayed, 50 of many in this case:

By clicking the Arrows, you can page through the emails. In my case, I had over 250 emails that were over a year old:

You can also add additional search criteria under the search bar such as From or Has Attachments and even open up advanced search for many other choices. Before applying any management to these particular emails, such as deleting, moving, or archiving, I want to move over to the identification section to provide some further tools.
Identification
Now that you have searched and sorted your emails, there are certain additional organizational tools you can use to identify your emails, both temporarily and permanently.
Starring
Starred emails were mentioned earlier. You can star any email, or group of emails. The practical purpose of this is to set an immediate reminder that this is an email that needs attention.
The issue many people run into is that the default yellow star is great, but you simply can’t use it for all emails you need highlighted. Well, Gmail has a great solution. Go to the Settings gearbox, then See All Settings, and scroll down to the Stars section in the General tab:

Simply drag the additional symbols you’d like as options. Choose between 1, 4, or all stars. Now when you want to star an email, click the star icon until the preferred symbol and color appear.
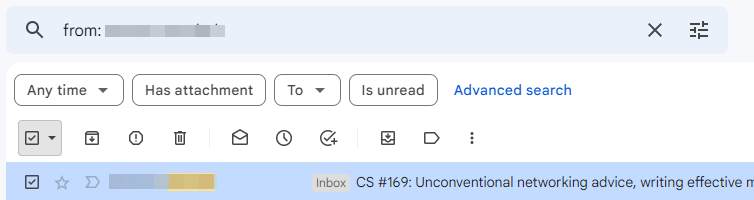
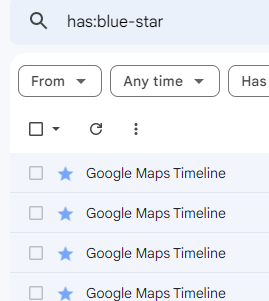
One thing Gmail does not do a great job of is telling you what to do with a starred email. The advanced search box does not have that option, so what do you do? Well hidden in the search operators is a search method. You can use the operator Has (ex. Has:red-star or Has:green-check).
If you hover over the star icon while in Settings, it will tell you the name, which you can use when searching for any email with that specific identifier. In my case, I might use a blue star to identify emails from Google Maps. I can search for anything with a blue star:
Folderless email structure
The biggest difference between how Gmail and Outlook manage storage, is folderless versus folders. In Outlook there are folders where emails can be moved, searched, and labeled. Categories apply to the email level.
In Gmail, the structure is folderless, instead using categories and labels to sort and store emails. In both cases, emails are essentially moved out of the inbox, and into a separately managed area, but the naming is different.
Categorizing
Categorizing emails is in large part done automatically in Gmail, but you can train the functionality simply by moving emails into a category. For instance, if you have messages sent from various social media platforms, you can move them into the Social category.
Gmail will ask if you want this done with future emails from this sender, and responding yes will ensure Gmail does this for you automatically.
Categories are fixed by Gmail, and you can display which ones are preferred by going into Settings > See all Settings > Labels.
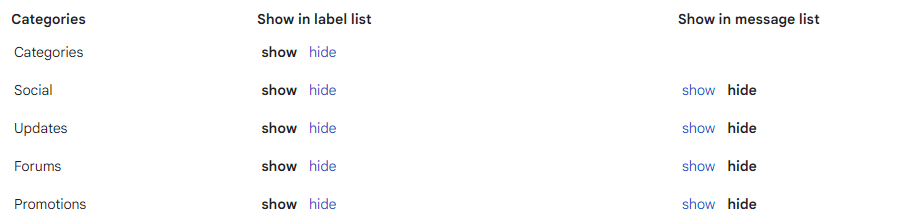
Here you can choose which categories appear in the label list on the sidebar, and which appear above the message list.
Labels
There are two types of labels in Gmail: system labels and custom labels. System labels are things like inbox, spam, and trash, and those from the action icons, like snoozed, starred, and important.
Custom labels are the tags you can apply to emails for sorting purposes. There are a few defaults like personal, receipts, work, and others, but you can apply as many as you’d like. Again, using Settings > See all Settings > Labels, you can add labels and modify how they are displayed.

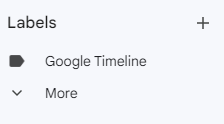
Earlier, I did a search for all Google Maps Timeline emails (using Has:Blue-Star). To continue in the email management chain, I created a new label Google Timeline, and I am going to re-conduct the search and label these Google Timeline. Once this has been completed, these now have that logical sort, and I can simply click on that label in the sidebar to find them:
In the inbox, labels display to the right of the subject.

You can apply multiple labels to an email as well. Here I created another one labeled Personal.

Notice you can also apply colors to the label. As you look at your inbox, emails with applied labels will show as blue rows. Google indicates that you can have up to 500 labels. Anything above that will slow down the loading of your account.
To further clean up my inbox, I am going to add an additional filter of Is Unread, so I can review the unread emails. Then, under the actions menu, I can check the Select All box, and mark them as read.

Now we have effectively managed several dozen emails, and reviewed or marked the remaining as read, reducing the inbox count.

Archiving
There are essentially two different inboxes in Gmail, they are Inbox and All Mail. The inbox is a collection of emails currently in play. As new replies come in, the message chain continues, you can apply labels and categories, and this is considered your active inbox.
The All Mail inbox contains these, as well as other mail that you have applied other actions to, and this is the main one we are going to discuss when it comes to archived emails.
I want to show you how to use this, but more importantly, I want to show you how to do this better, as Gmail tends to bury these emails so you have to search for them, which provides much less flexibility.
How Gmail has you do it:
- Select the email so the Action Menu appears.
- Select the archive button. This moves the email to the All Mail inbox. However, there is no labeling of the email and no search operator, so you will need to know some aspect of the email to find it. But if you notice, in the All Mail inbox, it will not have a label. This will allow you to do a no label search. One caveat is that you have to eliminate other categories it might be, like the drafts or inbox. It looks a bit like this: in:sent in:draft-in:inbox and has:nouserlabels. The problem here is that it misses categories like SPAM.
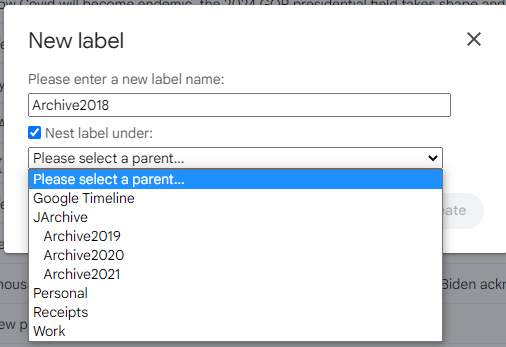
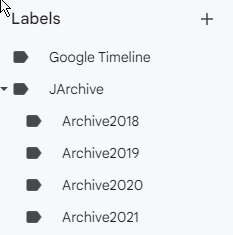
- My solution is to simply create an archive category. For Gmail, you can’t create an Archive label (as the system label Archive already exists), so I suggest creating a label with your first initial in front (ex. JArchive). If you want to separate the archive by year, create additional years (ex. Archive2019 or Archive2020 etc) and nest them under the JArchive.
- Now simply enter the search criteria, replacing the YYYY with the four digit year (ex. after:1/31/YYYY before:12/31/YYYY). Once your search results appear, if you have more than a page worth, click on the Select all conversations that match this search message.

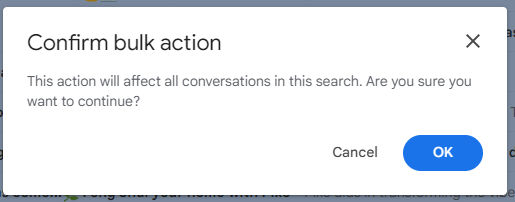
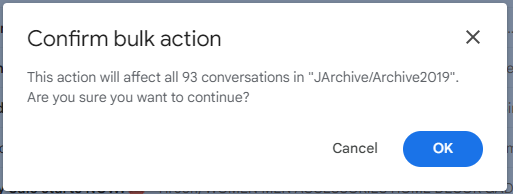
- Now just drag them to the label you created matching the archive year and confirm the bulk action:
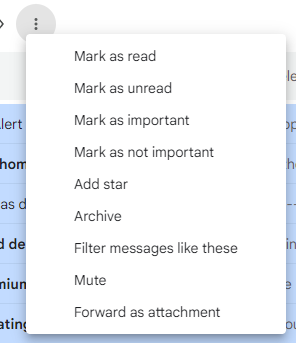
- After moving the messages into the archive folder, you can now archive them by clicking on the folder, selecting the all messages option, clicking the horizontal ellipses, and then selecting Archive from the menu.
- Confirm the bulk action.
Having an archive label that narrows down the year allows you to find emails by both the label and by generic search. The label narrows down the year, and the search can make it wide. You can also click on the search labels on the side bar, this will open up each year as you’ve labeled them.
If you do not want these shown, simply hide them in settings as shown earlier in the article.
Get Automating!
As you can see, managing your inbox can be done. It starts out with searching your inbox and looking at what is there, applying immediate management, labeling and categorizing as necessary, and then marking your emails.
Using a combination of these identifiers, you can now search your inbox and address bulk amounts of emails at once. Finally, archive those emails logically to take them out of your inbox, so you can focus on the next incoming email.
Chances are, a lot of the emails in your inbox are from your project stakeholders—read up on best practices for stakeholder management here.
Subscribe to The Digital Project Manager newsletter for more tips and tricks on cleaning up your processes and boosting your productivity.
Related read: The Rise Of Productivity Paranoia In The US And How To Navigate It