Get Your Project Overview Statement Right: Tips and Tricks
Have you ever worked on a project where you got going, and then there was confusion about what you were actually supposed to be doing? The client thought something different, or you didn’t have the agreement from the internal stakeholders that you thought you had.
How frustrating.
The project initiation phase is where you start to pull together all the stakeholders and what they want, to get the whole project team aligned behind the idea. And the project overview statement is a document that can help.
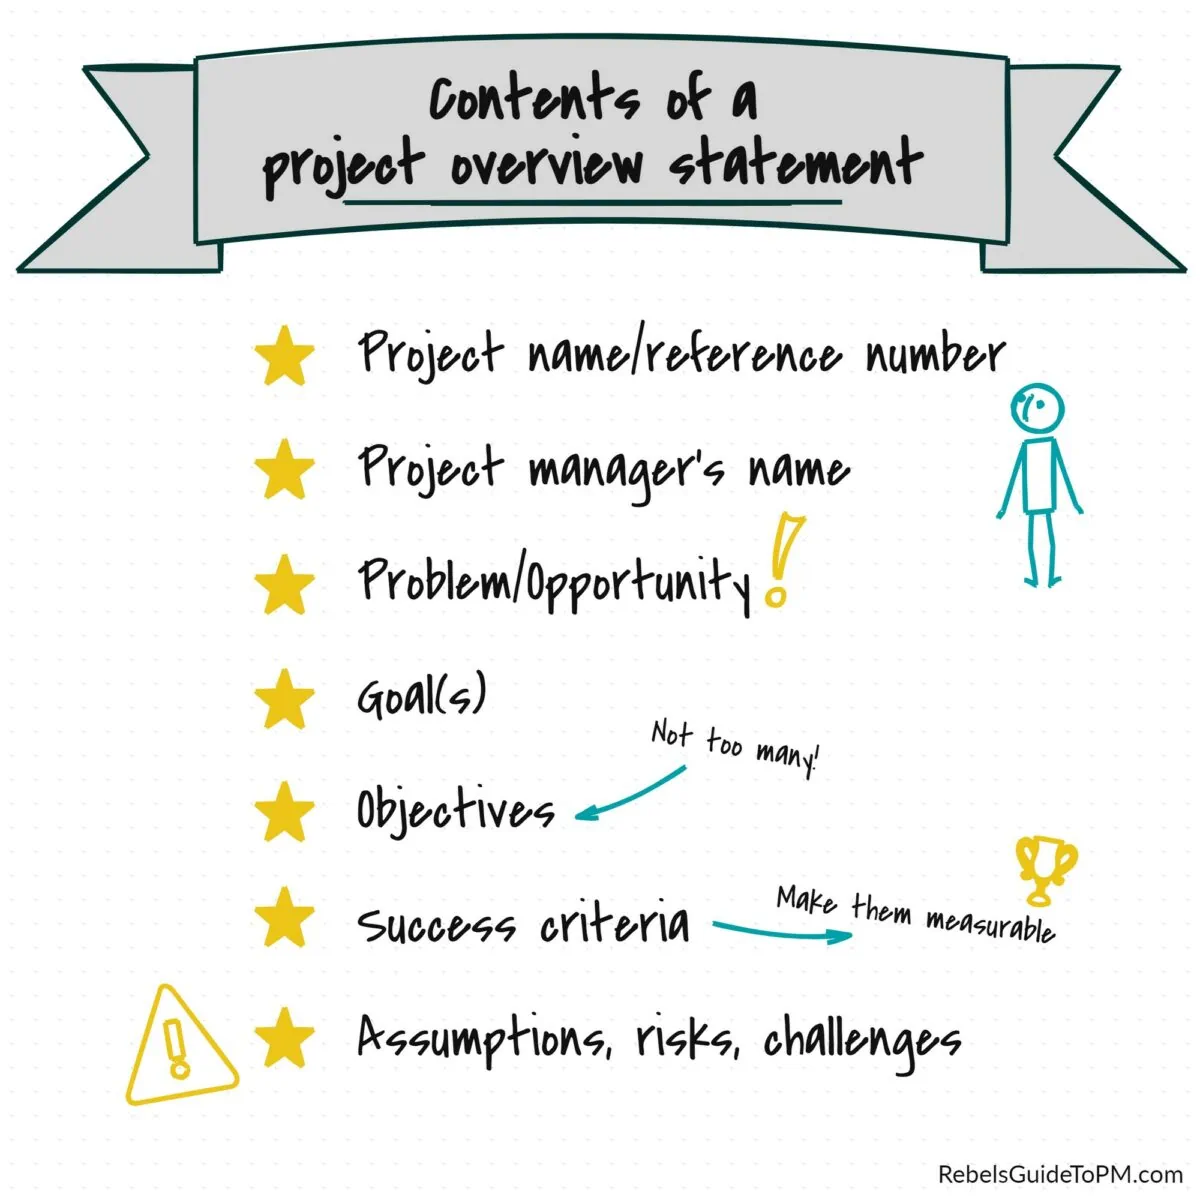
I’ve used this format (see the example layout and structure below which gives you a template to follow) to summarize projects when we didn’t have the time or inclination to put together a gigantic project initiation document. And before we created a project plan.
In this article, you’ll learn more about overviews, how to write them and when to use them.
What is a project overview statement?
A project overview statement is a document that includes a brief description of the project, its rationale and objectives, and its expected outcomes. It is a summary of the work and what is expected.
A project overview statement should be clear and concise, providing just enough information to give key stakeholders a general idea of what the project is about and why it is important without getting into too much detail.
The purpose of an overview statement is to get everyone on the same page about the basics of the project before more detailed planning begins.
It’s similar to a Project Charter or Project Brief. Like those project documents, the aim of the project overview is to secure support to move the project into the next phase: the doing. It’s a document you produce during initiation to summarize the work at a high level and get everyone on the same page.
Literally, a page.
Try to keep your overview document to a single page, or a couple of slides.
How to Write an Effective Project Overview Statement
As a project manager tasked with kicking off a new project, it can be easy to get bogged down in the details and the pressure of having to get going. That’s where the overview helps.
These are the steps to get started writing an overview for your project.
1. Keep it short
You only have a page to summarize your project, so each sentence count. Get to the point quickly, and don’t try to cram too much information into your overview.
I find that it’s easiest to write it myself first, and then share it with the team for finessing and agreement. They have to agree on it, but if we try to co-create the document, we’ll still be working on it in a month.
2. Focus on the problem you’re solving or the need that you’re filling
There should be a problem or opportunity that the project is addressing. This needs to go toward the top. This is the headline of the ‘why’ of the project.
Sometimes this section will include a nod to the expected project timeline, for example, if the problem has to be solved by the end of the year.
Bonus points if you can put this in the language of your client or users. They are the ones having the problem that you are trying to resolve with this project.
If you don’t know how to phrase the problem in a couple of sentences, ask them.
3. Explain how the project addresses that problem or need
What makes your project special? What are the goals you are going to achieve by delivering this project?
List out 1-3 project goals that summarize what you are hoping to get out of the work. You can lift these from the business case if there is one, or, you’ve come from the solution design and requirements gathering phases; those should have given you enough information to put in a few bullet points about the specific goals for this piece of work.
Alternatively, if you are creating an overview statement as a proposal to convince senior leaders that the work should happen, go with what you know about the problem. Be data-led in all cases, and as specific as possible.
4. Add in the project objectives
The next section should be all about the objectives. Well, I say ‘all about’ but you really only want a couple of bullet points in here. They lead on from the goals.
They could include the project deliverables: delivering the deliverable is an objective.
Be as specific as possible to make them measurable. For example: “Deploy the software to 150 staff in 3 offices.”
5. Document the success criteria
Next, your project overview template should have a section for success criteria. How will you know if the project has been a success? How will you (and the rest of the team) be judged?
The solution design or investigation phase will have flagged up what project stakeholders think is important, and generally, that is how they will judge success. Still, it’s useful to have that written down so you can refer back to it later.
The success factors normally link back to project requirements: once you’ve delivered the requirements, you’ve hit the goals and met the criteria, but double-check that’s the case for you.
If the success criteria don’t directly link to requirements, should they? Or do you need to add new requirements?
Try to make the success criteria measurable, so think about how you can track whether or not they have been reached (so you can close the project).
6. Provide the context
Finally, provide some context around what is happening on this project. Consider the assumptions, risks, challenges, constraints, known issues, and anything else that is going to affect how the project moves forward from this point.
Does it all still fit on one page? Good. Don’t reduce the font size, now. If you still have space, add a list of project milestones and key dates. I wouldn’t go for a full project schedule in here, but make the most of the space you have.
When you are writing the document, use language that will resonate with your audience – make sure you know who you’re talking to! Your overview should be tailored to your audience. Use language that they will understand and that speaks to their needs.
Typically, that means choosing business-oriented terms and not highly technical
Finally, this warrants saying again: be clear and concise – no one wants to read through pages of fluff just to get to the basics about the project.

Get approval
When the document is complete, it’s used to get approval from the project sponsor (and any other important people).
Will this document alone prevent project failure? Not at all. But at least it’s a start, so you have an agreement to proceed, and there is clarity about what happens next.
Essentially, getting this document approved is a stepping stone to creating a more detailed project management plan, digging into product features and business processes that are going to be created or changed, and anything else you need to do as you move further through the project lifecycle.
Should I use an overview or a Charter/Brief/something else?
Honestly, it doesn’t matter. The point of creating a document at this stage of the project is to make sure everyone knows what to expect next. As long as you have something, and people agree to it, that’s fine.
I like the overview format because it’s short, and I like short. Having said that, I do put a lot of info into project plans, so we do have other documents later that flesh out all the detail for completeness.
How is this different from a scope statement?
The overview is not very different from a project scope statement, but I don’t like using that term as scope means something very specific in project management.
The scope statement, in my experience, tends to be longer and covers things like a list of deliverables, a list of stakeholders, budget information, constraints and exclusions, more on timing, and maybe an overview Gantt chart. It should also have a summary of project scope – what’s in and out – which is something that is only lightly touched on in an overview document.
Ultimately, it doesn’t matter what you call the document and what goes in it. I recommend the bare minimum to meet your governance requirements and secure support for a project to move into the next phase with everyone understanding what’s required. So if you need to add another section, just do it.
Next steps
Are you ready to write your document now? Here are some next steps.
- Make the decision: are you going for a one-page overview or a longer Charter/Brief document?
- What help from other people do you need writing it?
- What data do you need to complete it?
- What is the process for getting it signed off?
We hope this guide has helped you learn everything you need to know about writing an effective project overview statement. By following these tips and tricks, you’re on the road to a successful project because you’ve got this bit right: aligning your stakeholders behind common expectations. And that’s no mean feat.
Pin for later reading

